How to Create a Stamp or Punch Card
Loyaltymaster is a dynamic customer loyalty platform, and one of its many features is the ability to create custom stamp-based loyalty cards.
A stamp card and a punch card are the same. We'll use the name stamp card in this guide.
This comprehensive guide will walk you through each step of this process.
Section 1: Introduction to Stamp Card Creation
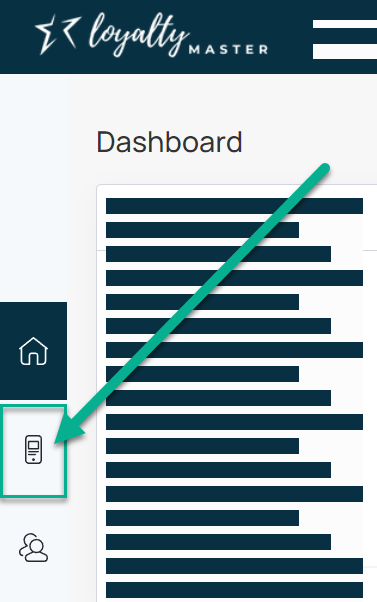
- After successfully logging into the Loyaltymaster console, navigate to the left-hand menu.
- Select the "Cards" module from the list.
- You can create a loyalty card using a "Template" from a wide range of pre-installed templates or create a stamp loyalty card from "Scratch".
- Please note: This guide will cover stamp card creation "From scratch".
To begin, click on the "From scratch" button.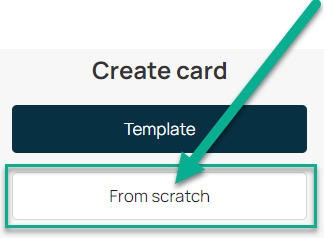


Section 2: Choosing Card Type
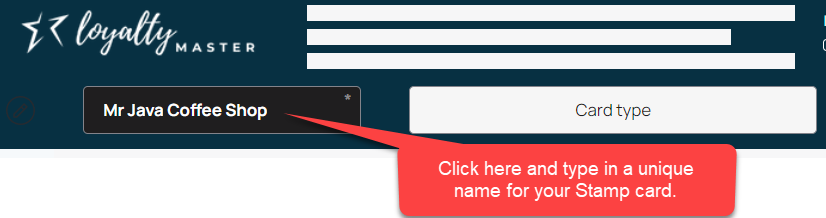
- As to the example below, "Click" on the "Stamp card № " and give your stamp card a unique name so that you can easily identify it in the future.
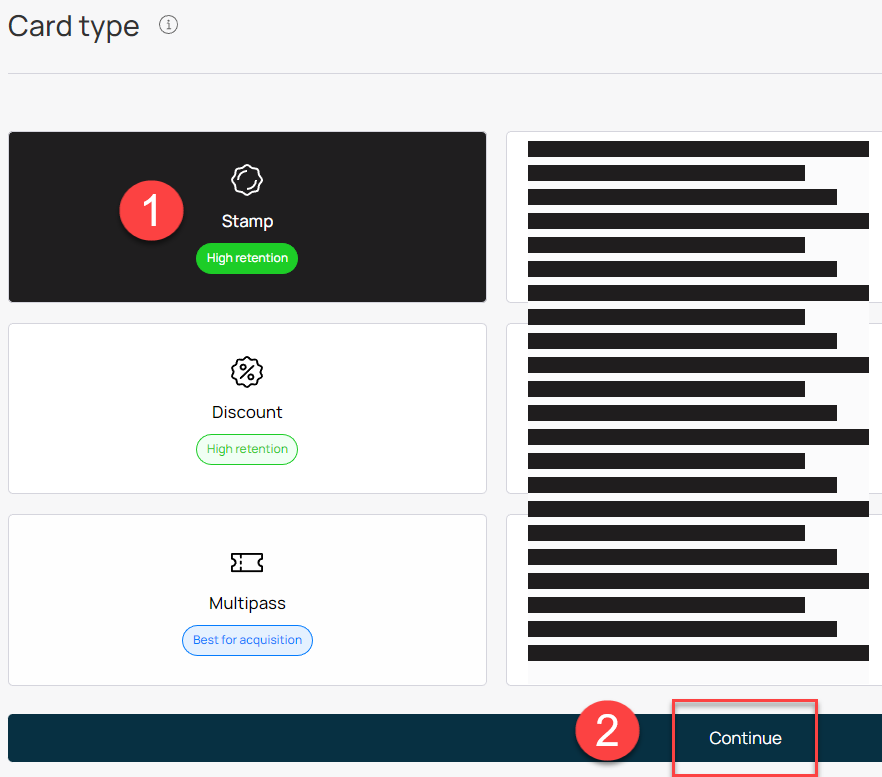
- The second step in creating a stamp-based loyalty card is selecting its type.
Choose "Stamp" from the available card types. - After selecting "Stamp", click the "Continue" button at the bottom to proceed to the "Settings" section.


Section 3: Configuring Card Settings
In this section, you'll input the specific settings for your stamp loyalty card.
Follow the steps below:
- Select the language in which you want to create the stamp card using the "Language" dropdown.
- Set the Date format, Thousands Separator and Decimal Separator.
If you are going to ask the customer's birthdate during the digital card registration process, then it is important to select the correct "Date format" in the dropdown for your country or region. This will ensure the card registration process records accurate information. Otherwise, the days/months recorded might be the wrong way around.
Example: 06/07/1967 can be 06 July or 07 June depending on the Date Format selected in the dropdown.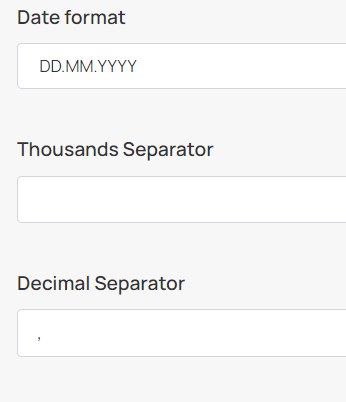
- Select the expiration date for the stamp card using the radio buttons under the "Card Expiration Date" heading.
The option "Fixed term after card issuing" is recommended, which lets you define the number of days after the stamp card expires after it gets activated by your customer.
Thus, the countdown begins when the customer enrols or installs this stamp-based loyalty card.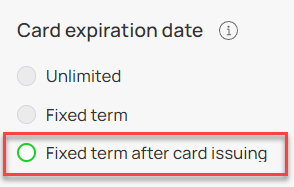
- Choose your business's location(s) from the "Locations" field. This is an important setting.
( Please click here ) to get a full explanation of how "Locations" work. - In the "Card Issuing Form", define the fields you want to include on the stamp card.
You can "Add" and "Delete" fields as needed.
You can delete fields by clicking the "X" button at the end of the fields line. Please see the picture below.
TIP: It is recommended to keep the "Phone" field as "Unique"
Use the "Add field" button to add extra fields.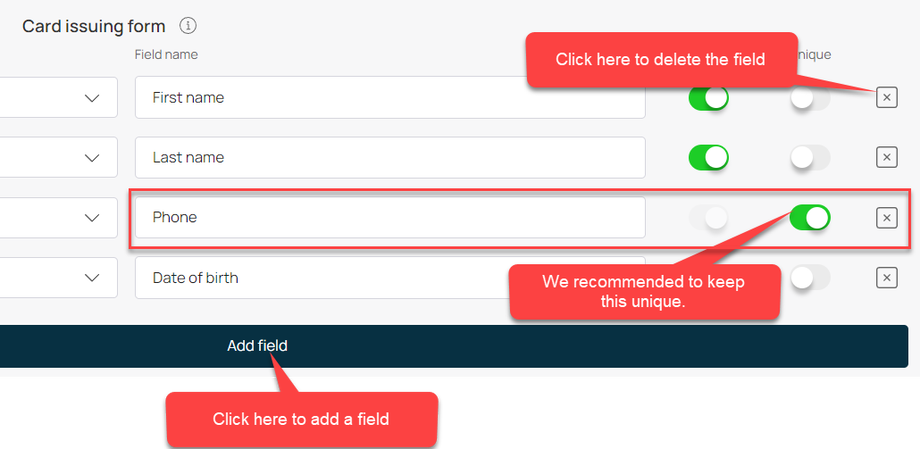
- You can create a channel link for the analytics to be tracked the traffic generated by that channel under the "UTM field".
UTM, or Urchin Tracking Module, is a simple code that can be attached to a custom URL in order to track a source, medium, and campaign name. This enables tracking tools like Google Analytics to tell you where Website users and searchers came from as well as what campaign directed them to you.
- The "Phone Mask" dropdown lets you choose a Country where this Stamp based loyalty card will be used.
Please select the country so that communications will work for the cell phones used in the selected country.
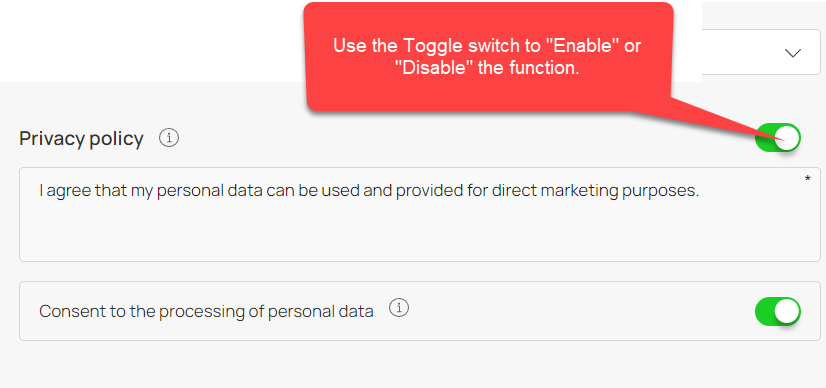
- If required, type in the "Privacy policy", which will be used for this loyalty card and remember to "Enable" the "Consent to process personal data" if needed by enabling the Toggle switch.
- In the "Analytics" field, you want to copy in the customized scripts needed for analytics.
This will be scripts such as GTM. Please see the explanation below.Google Tag Manager (GTM) is a free tool that allows you to manage and deploy marketing tags (snippets of code or tracking pixels) on your website (or mobile app) without having to modify the code.
GTM is a powerful tool in the hands of marketers, analysts, and developers, helping to streamline the process of collecting data and deploying marketing campaigns.
- Once all fields are filled, click the "Continue" button to proceed to the "Design" section.


Section 4: Designing the Card
This section focuses on customizing the aesthetic aspects of your stamp loyalty card.
Here's how you can configure the design:
- Choose the number of stamps at which the loyalty card holder can redeem the reward by clicking on the number.
In the example below, we clicked/chose the number 6.
Thus after 6 stamps, the loyalty card holder qualifies for their reward.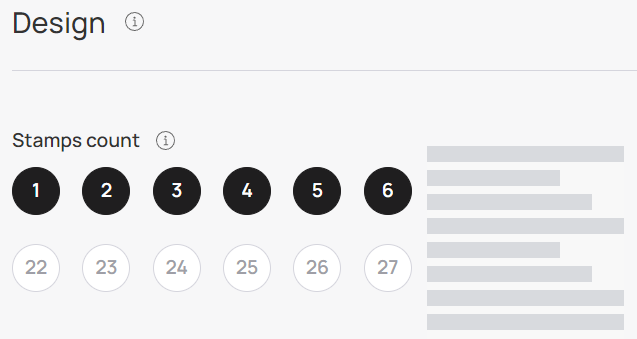
- Click on the dropdown to select the icons representing how the "Active stamp" and "Inactive stamp" would appear on the digital stamp card.
The customer already earned an active stamp, and an inactive stamp must still be earned.
Example: on the old Paper based Stamp/Punch cards, the active = punched or stamped and inactive = still needs to be punched or stamped.
Tip:
You can also type in the name of the icon you are looking for. In the example below, we typed "coffee"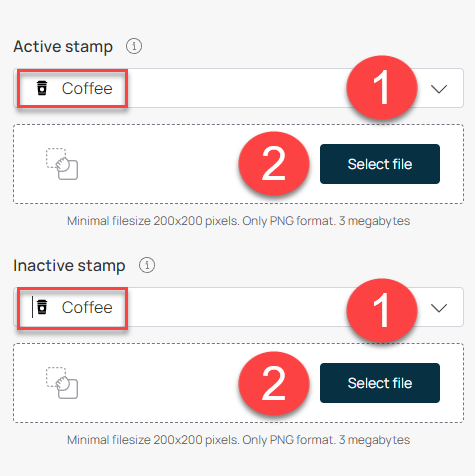
- You can also upload a picture representing the Active and Inactive stamps by clicking the "Select file" button.
To ensure proper display, ensure the picture size is at least 200 x 200 pixels. Furthermore, please note that we only accept PNG format files with a maximum file size of 3 megabytes.
We recommend using the Free version of Canva to resize your images to the recommended sizes. - You can upload a "Logo" to be displayed on the loyalty card.
For optimal display, the recommended size for the Logo is 480x150 pixels with a minimum height of 150 pixels. Please ensure the format is PNG and the file size does not exceed 3 megabytes.
We recommend using the Free version of Canva to resize your images to the recommended sizes. - You can upload an "Icon" to be displayed on the loyalty card.
To ensure optimal display, it is recommended that the Icon have a size of 512x512 pixels and are square.
Please use only the PNG format and keep the file size within 3 megabytes.
We recommend using the Free version of Canva to resize your images to the recommended sizes. - You can upload a "Background under the stamps", which will serve as a background picture that appears directly under the loyalty card's stamps.
To ensure proper display, the background picture should have a minimum file size of 1125 x 432 pixels and be in PNG format. Please note that the maximum file size allowed is 3 megabytes.
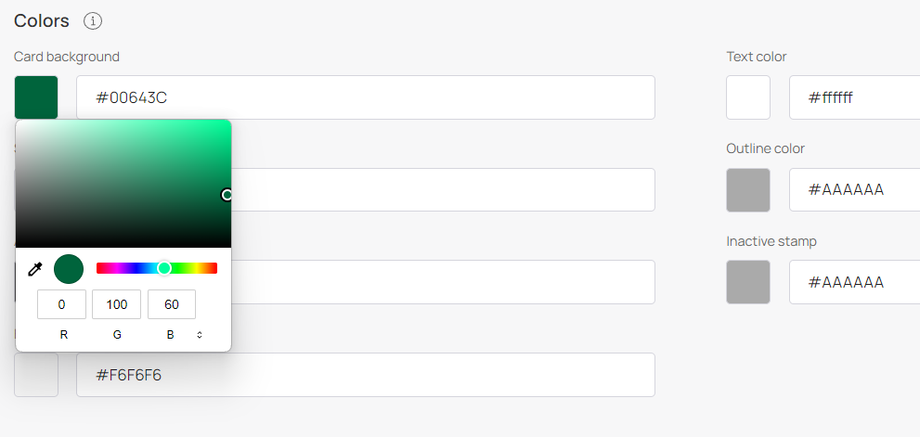
We recommend using the Free version of Canva to resize your images to the recommended sizes. - To customize your loyalty card, you can select different colours for various elements, such as the
Card background,
Text colour,
Stamp background (Only if you did not upload a Background under the stamps),
Outline colour,
Active stamp,
Inactive stamp, and
Background beneath the stamp.
TIP:
In the right-hand pane of your console is an image of a smartphone that updates in real-time how your digital loyalty card will look as you make changes.
This is an easy way to experiment in real-time with the settings to get the look and feel you want for the loyalty card.
One simple approach is to experiment with various colours until you achieve a satisfactory outcome.
Please see the example below.
To preview how your loyalty card will appear on "iPhones" and "Android smartphones", click on the respective buttons on the upper right-hand side of the picture of the smartphone.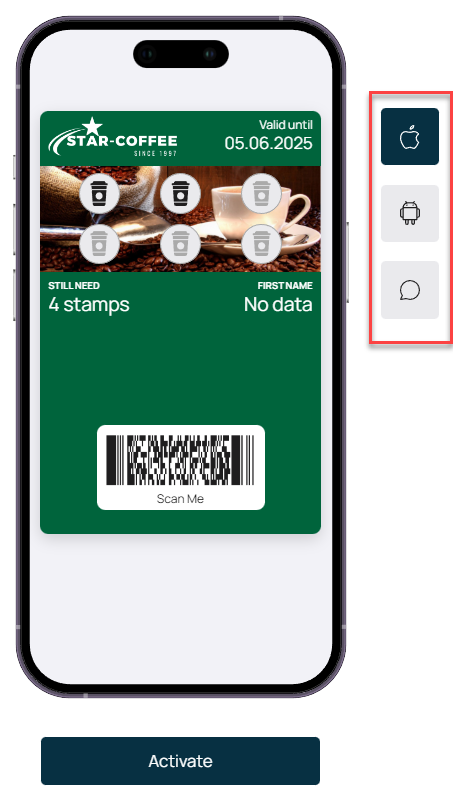
- Enter what text appears on the card in the "Fields name".
- Decide whether you want the "logo" and "background" to appear on the "Card Issuing Form" by sliding the selector buttons. Green means it is selected.

The "Card issuing form" is the web-based loyalty card issuing form the customer sees when they want to enrol on the loyalty program. - After making all the selections, click the "Continue" button to move to the "Information" section.


Section 5: Filling in Card Information
This section involves inputting some relevant information about the rules of the loyalty program.
This will show on the backside of the loyalty card, explaining the rules of your loyalty program to the customer so that there is no confusion about how it works.
- Fill in the following:
Card description,
How to earn a stamp, how to earn a stamp, and messages to be displayed when a customer earns a stamp or a reward.
Company name,
Reward details,
Earned stamp message and
Earned reward message.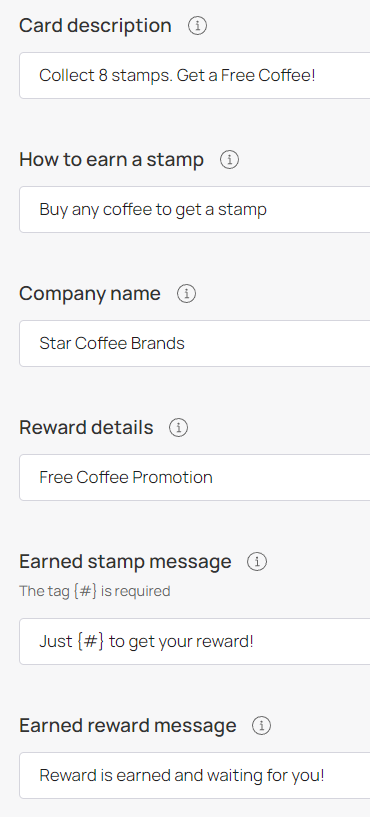
- Here you can define the number of stamps a customer gets when enrolling in the loyalty program.
It can be "0" rewards, but giving a point (reward) or more is recommended, as this is a good way to entice potential customers to enrol on the loyalty program.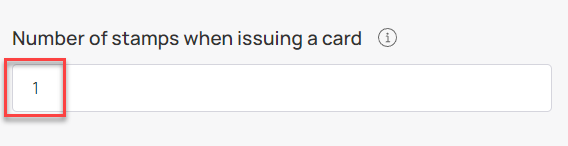
- Here you decide whether to use the "Multi rewards" function. If you do not put anything in the field, the reward will only be credited when the maximum number of stamps is reached as to the original settings when you started setting up the loyalty card.
What are Multi rewards?
Multi rewards are when you give more than one reward during the lifetime of the stamp loyalty card.
In the example below: After 3 stamps, 5 stamps and 8 stamps, the customer gets a reward.
Imagine it was a coffee shop reward card. After 3 stamps the customer can get any syrup for free, after 5 stamps a Free muffin and 8 Stamp any filter coffee for free.
TIP:
Suppose you want to give different rewards as to the above example.
In that case, it is recommended to "Enable" the "Redeem reward automatically" function to make accounting for what rewards the clients already redeemed easy.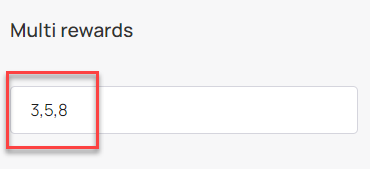
- You can "Enable" or "Disable" the Redeem reward automatically function here.
If "Enabled", the customer must redeem the reward at their next visit.
If "Disabled", the customer can redeem the reward another time.
Keep in mind that if the loyalty card expires in the future, then the customer might forfeit their reward if they do not claim it before the expiry date of the loyalty card.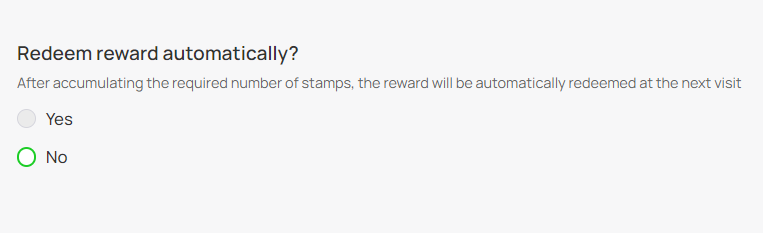
- Decide whether you want to "Activate" the powerful Customer Referral Program and how the referral points will be distributed.
This is straightforward and recommended to be used by the vendor.
This is a quick and powerful way to get your current customers to give you free referrals or free customers.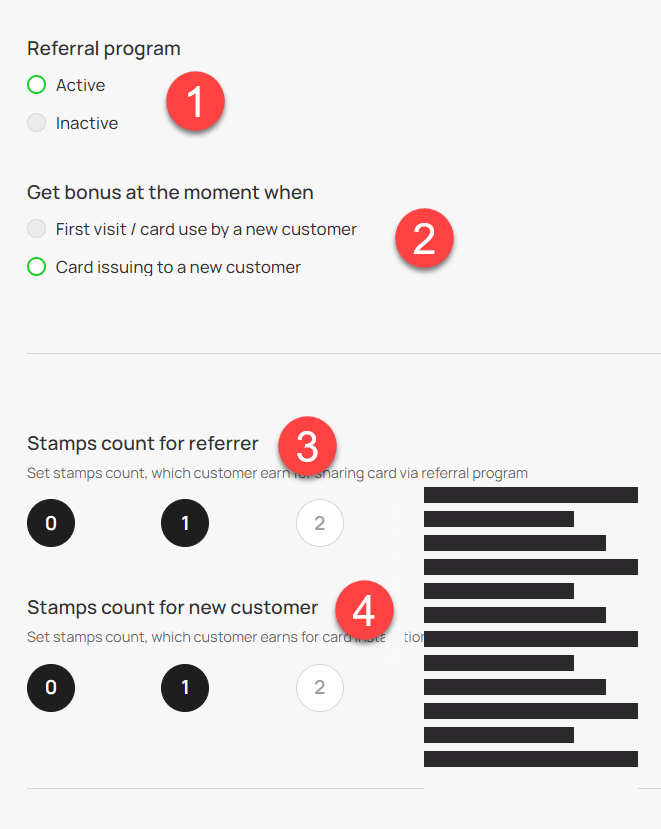
- You can also select to include the business details on the loyalty card.
Details like:
Physical address,
Phone number,
Website address and/or
Email address on the back of the loyalty card.
Add Ekstra links or fields by clicking on the "Add link" button and "Delete" a line or field by clicking on the "X" at the end of the line or field.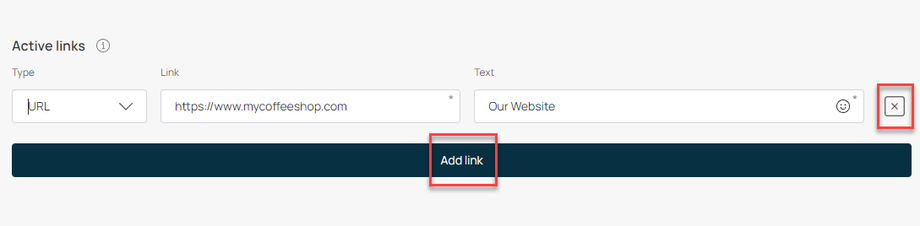
- Add "Feedback links" for the business to get valuable Customer feedback.
It helps to collect customers' positive feedback and increase business ratings on various online platforms.
We support the customer referral services of 2GIS, Booksy, Booking, Facebook, Flamp, Foursquare, Google, Yandex, Yell, Yellow Pages, Yelp and Zoon.
Click on the "Service" Dropdown field to select your preferred customer referral service, and in the next column, insert your referrals services URL.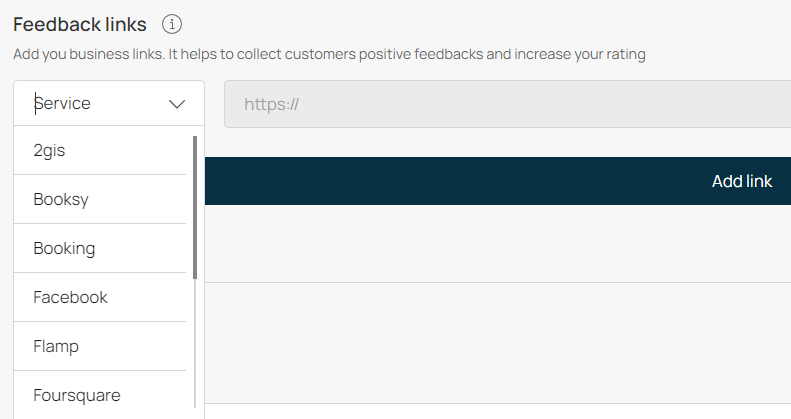
- "Enable" or "Disable" the "Terms of use" field by sliding the green selector button.
Enable if you want to show the loyalty program rules on the back of the loyalty card.
Just type in the "Terms of Use" of the loyalty program.
See the example below for ideas.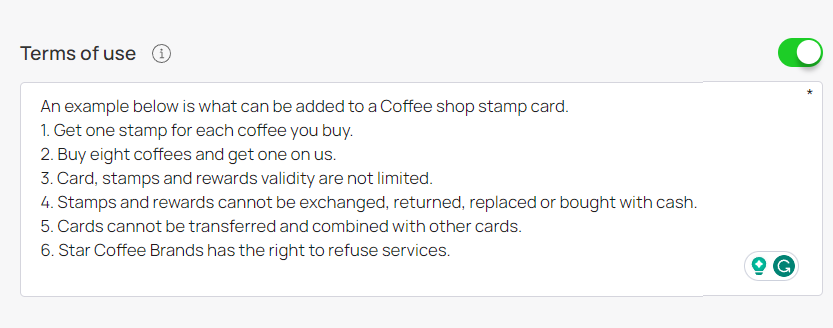
-
"Link to full terms and conditions" (optional)
You can also optionally decide to include a link to a webpage with the full terms and conditions of the loyalty program.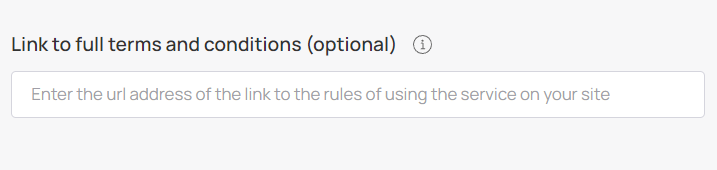
-
"Issuer information"
Fill in the information of the Vendor or the Loyalty card issuer here.
This is optional. If needed, you can fill in the following:
Company name.
Email address.
Contact/Phone number.
-
After you have inputted all the necessary information, click on the "Finish" button to "Save" your newly created loyalty card.


Section 6: Save, Preview & Test your new loyalty card.
- Upon clicking the "Finish" button, the Preview pop-up will be displayed.
Please see the picture below for an example.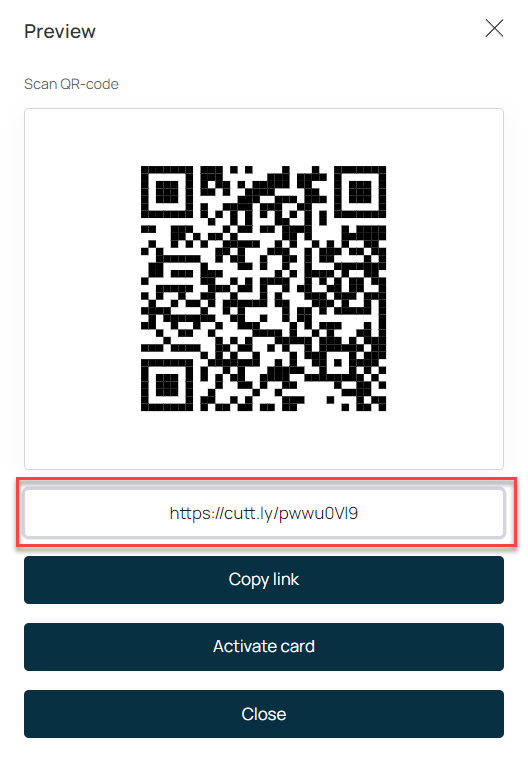
- To join the loyalty program, scan the QR Code with your mobile device's camera.
This will open a new tab/window on your default web browser, similar to the picture below.
Now you or potential customers can join the newly created loyalty program. - If you click "Copy link", you will copy the URL.
This will open a new tab/window on your default web browser, similar to the picture below.
It will work on all major web browsers like Chrome, Edge, Firefox and Safari.
Please note: It might render different displays depending on the operating system or device.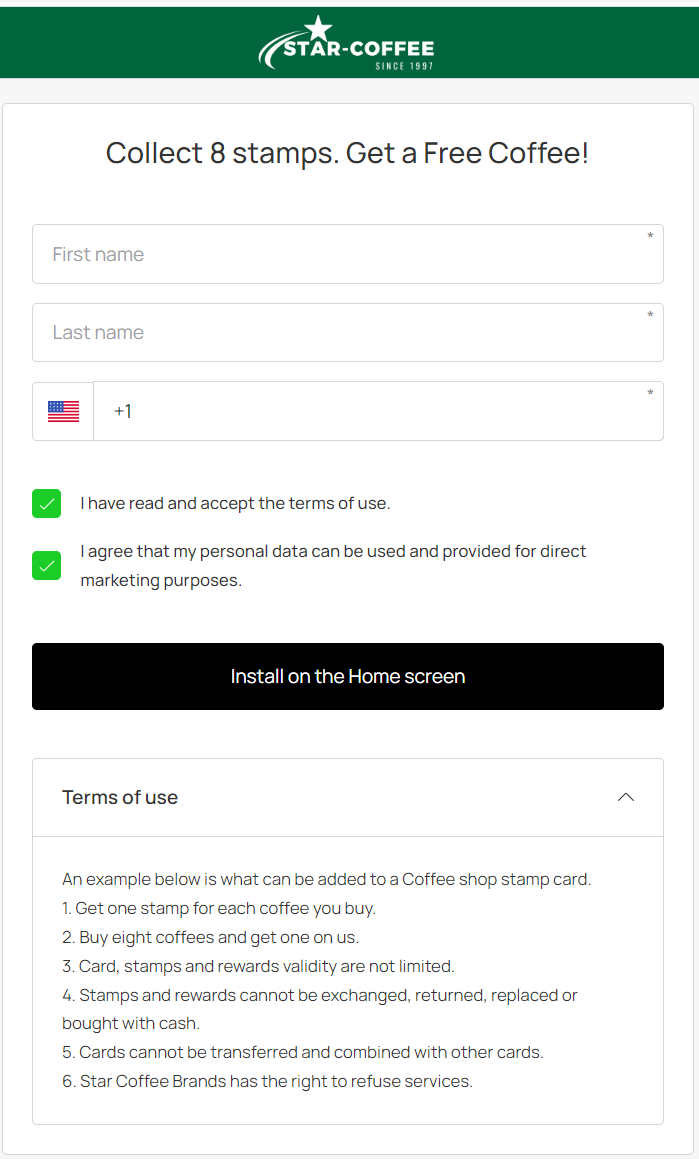
- Now it is time to "Test" your newly created Digital Loyalty card and ensure that you are satisfied with the look & operation and do not want to make any further changes.
If you need to make changes, then click on the:
"Home" button, then the "Cards" button and then the "Edit" button.
See the picture below explaining the process.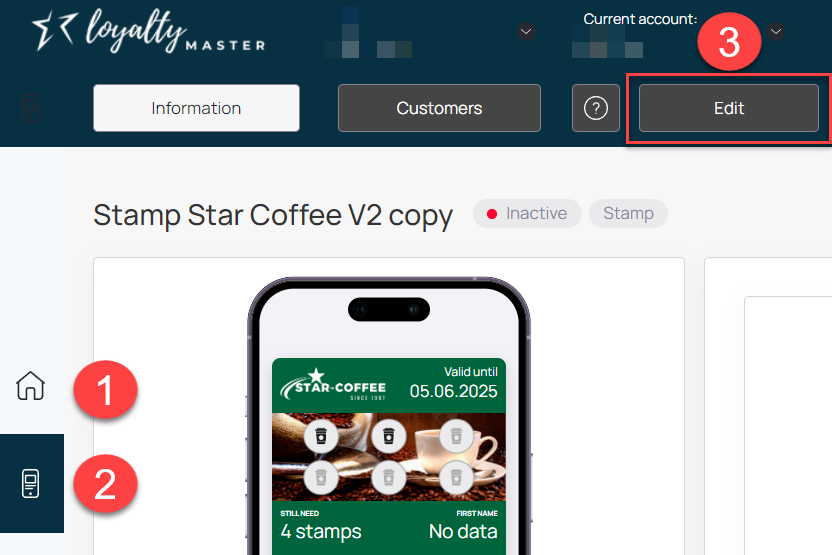
TIP:
When you do "Activate" the loyalty card, most settings will get "locked", and you will not be able to "Edit" the loyalty card anymore. This is designed to keep the integrity of the Digital loyalty card program intact. - Now you click the "Activate" button to activate the loyalty card.
It is ready for production, and distribution to potential customers can be commenced.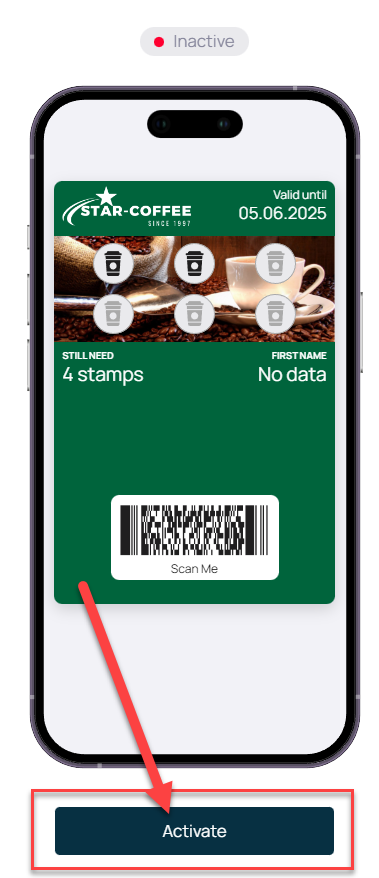
- TIP:
If after you "Activated" the loyalty card and then realize you need to make crucial changes, you find that you cannot "Edit" the specific function anymore, then you can make a "Copy" of the loyalty card and "Edit" the copied card.
Remember, this will only work if the loyalty card is not in production yet.
A new copied loyalty card will have a "New" unique identifier and not be part of the previous loyalty card.
All current customers will need to re-enrol on the new card and lose all their rewards.
This is why "Testing" is important before the card is released for production.
Please see the picture below explaining the process.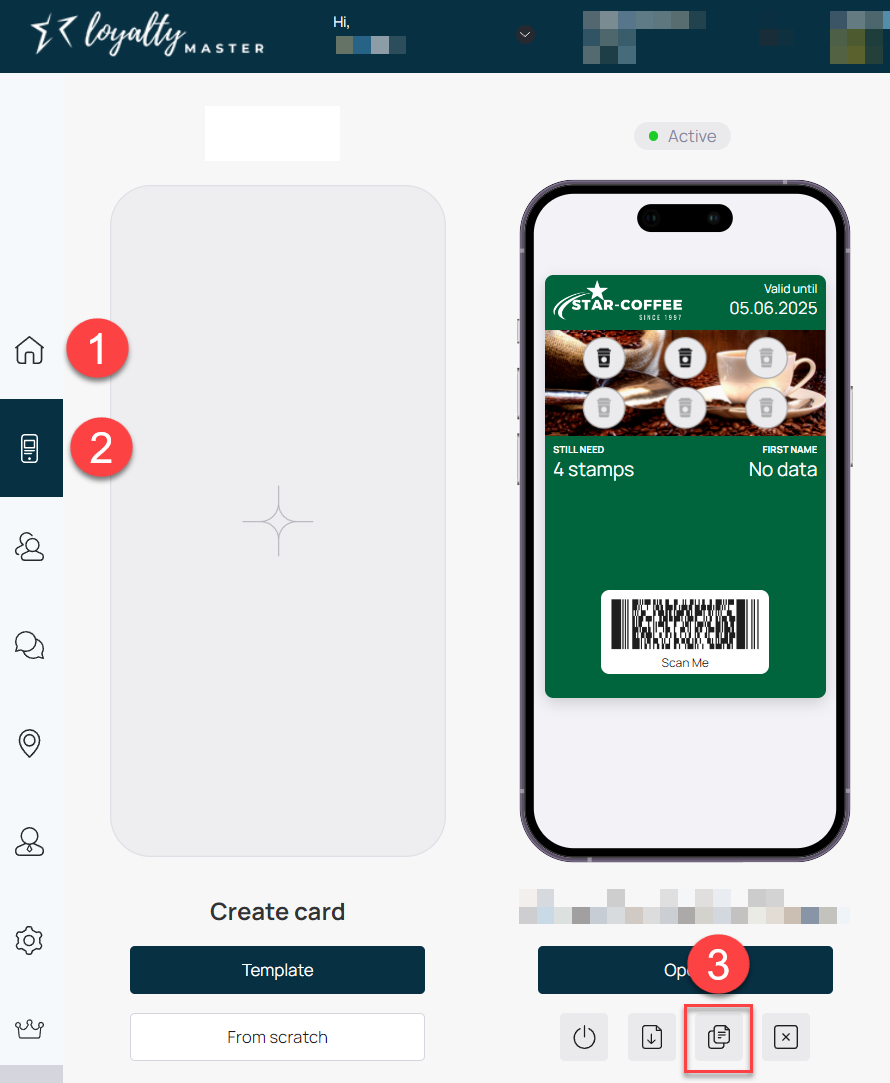


Troubleshooting
While the Loyaltymaster platform is intuitive and easy to use, you may encounter issues or have questions.
Here are a few common troubleshooting tips:
- I can't find the feature I need:
Make sure you're looking in the correct module.
If you still can't find what you need, you may need to upgrade your subscription to access additional features. - The card isn't displaying correctly:
Check that you've filled out all necessary fields and uploaded any required images. Remember that the card's appearance can vary based on the user's device. - The card isn't working as expected:
Double-check all settings, especially stamp and reward issuance, to ensure they're configured correctly.
If you still encounter issues or have any other questions, don't hesitate to get in touch with Loyaltymaster's support team.
Conclusion
This guide aims to provide a complete instruction manual on using Loyaltymaster's cloud-based software to create a stamp-based digital loyalty card.
Following the outlined steps, you can establish a successful customer loyalty program for your business.
Thank you for choosing Loyaltymaster, and we wish you all the best with your loyalty program.