Geolocations
Explore how the geolocations feature works in Loyaltymaster
On this page
Add your business locations and choose the cards that use each location's geo-push message. The Locations page shows geo-push within 100 metres (330 feet) and notes that it is available for iOS devices only.
Open Locations
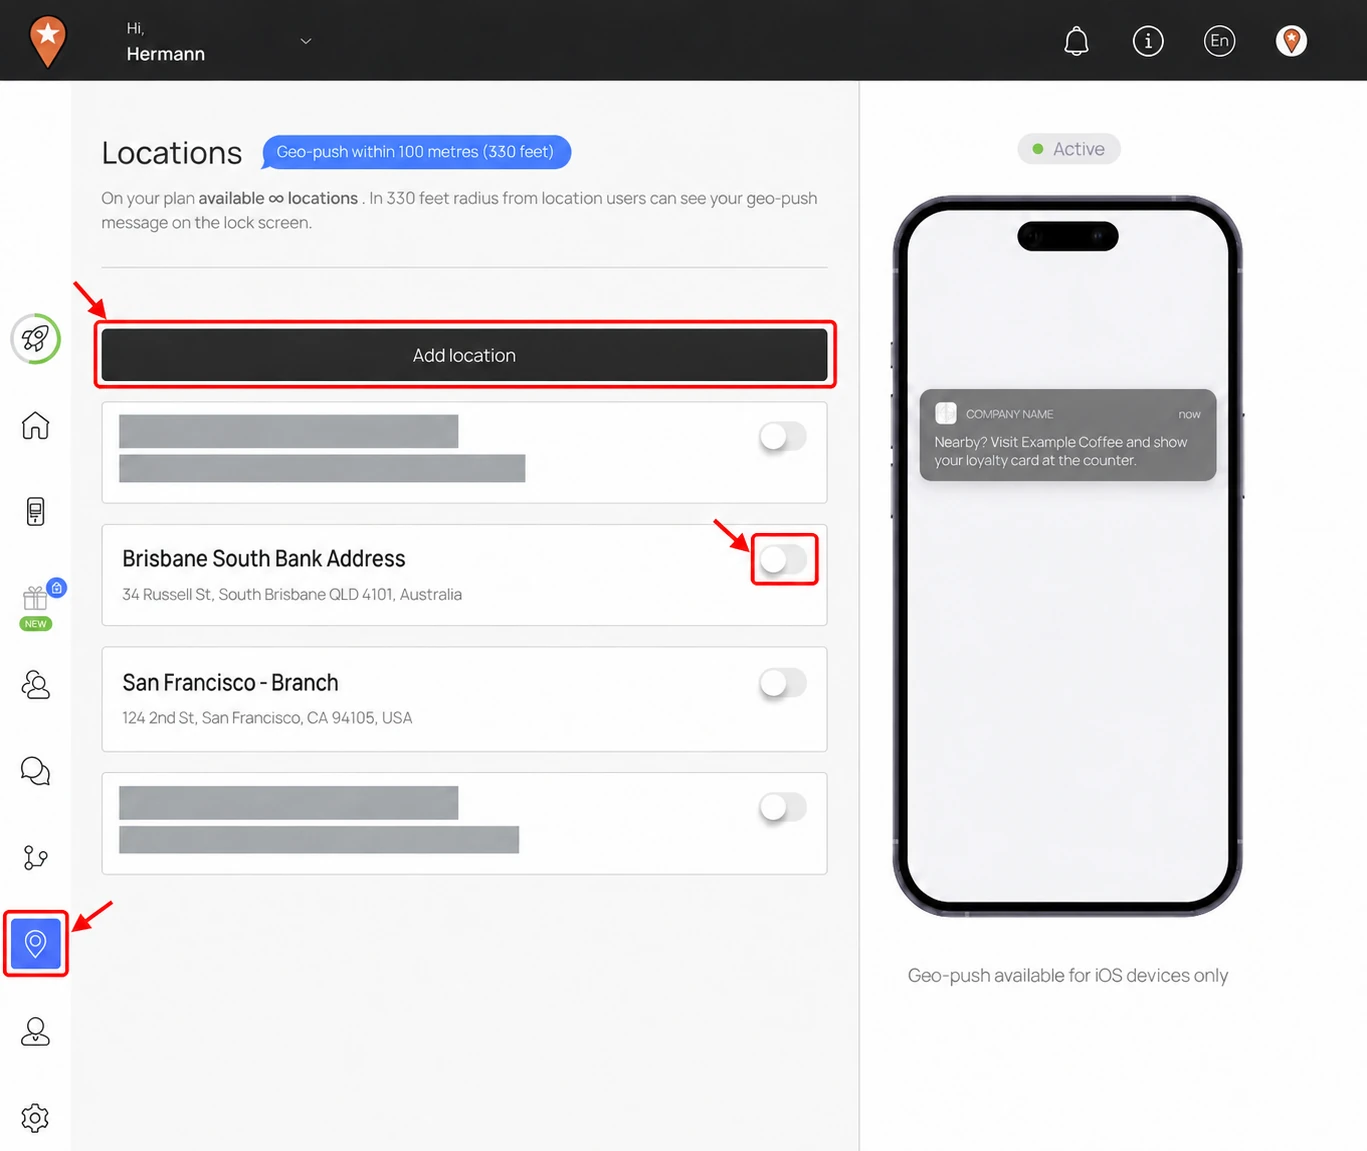
In the Loyaltymaster console, open Locations (the map-pin icon) from the left menu and select Add location.
Select any screenshot to enlarge it.
Add the location and message
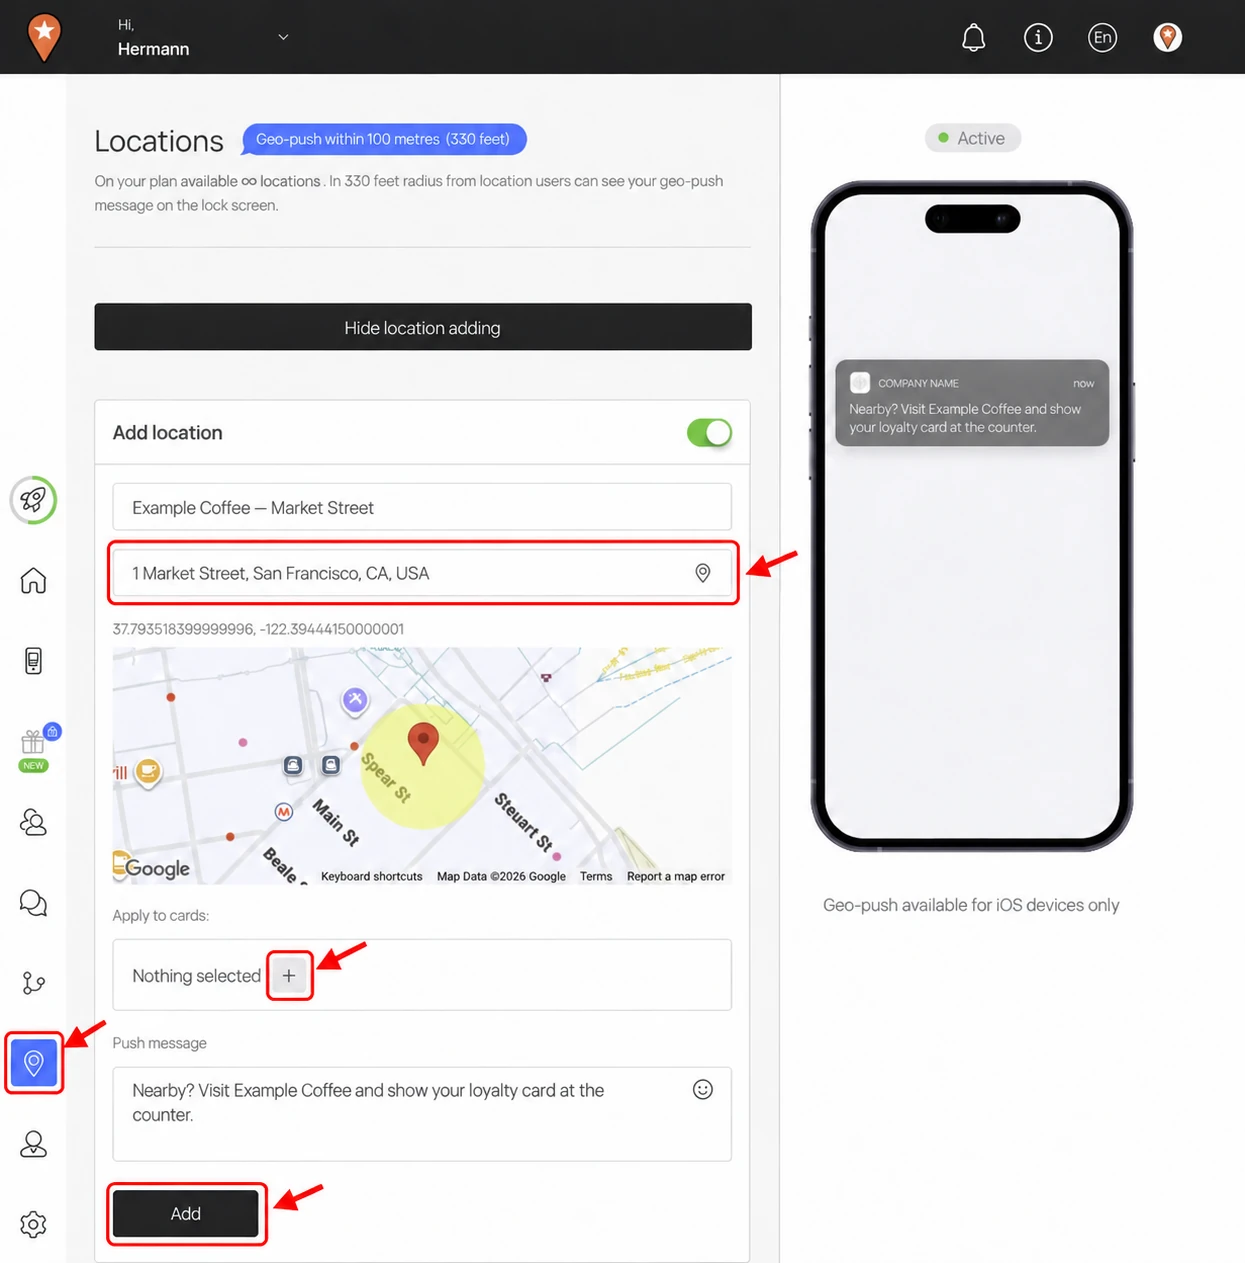
- Enter the Location name, such as your branch or shop name.
- Enter the Location address and choose the matching address from the suggestions. Check the map and position the pin at the correct location if needed.
- Under Apply to cards, use the + control to choose the cards associated with this location and its message.
- Enter the text in Push message. This is the location message customers with supported iOS cards can see on their lock screen when they are nearby.
- Select Add. Check that the saved location appears in the list with the correct address.
Example: Example Coffee — Market Street is an illustrative business. Enter your own branch address and message, check the map, then choose your cards with + before selecting Add.
Use the switch beside a saved location to enable or disable it. See Find your saved locations for the list view.