How the Scanner App Works
Learn how the scanner app works
On this page
Use the Scanner App at the counter to find a customer's loyalty card, add their stamps or points, and redeem rewards. The actions available depend on the customer's card type and the offer your business has set up.
Use Kiosk Mode for automatic transactions
For repeated scans that should carry out the same action, use Kiosk Mode. Sign in with the business owner account to enable it. It supports automatic stamps or points for eligible earning methods, coupon redemption, and subscription or membership visits. Some templates still require confirmation. Check card compatibility and choose the intended cards before use.
New Scanner App and specialised hardware
A new Scanner App and specialised scanning hardware are already available for Stamp cards. They are designed to help your team give customers stamps quickly and reduce mistakes at the counter. Support for all other loyalty card types is coming soon, bringing the same faster service to points, rewards and other loyalty transactions.
Contact us to ask about the new app and hardware for your business.
Open the app and sign in
- Open app.loyaltymaster.com/scanner-app on your phone, tablet or computer.
- Under Sign in via email, enter your manager Email and Password, then select Sign in. If you need an account, ask the business owner to add you as a manager.
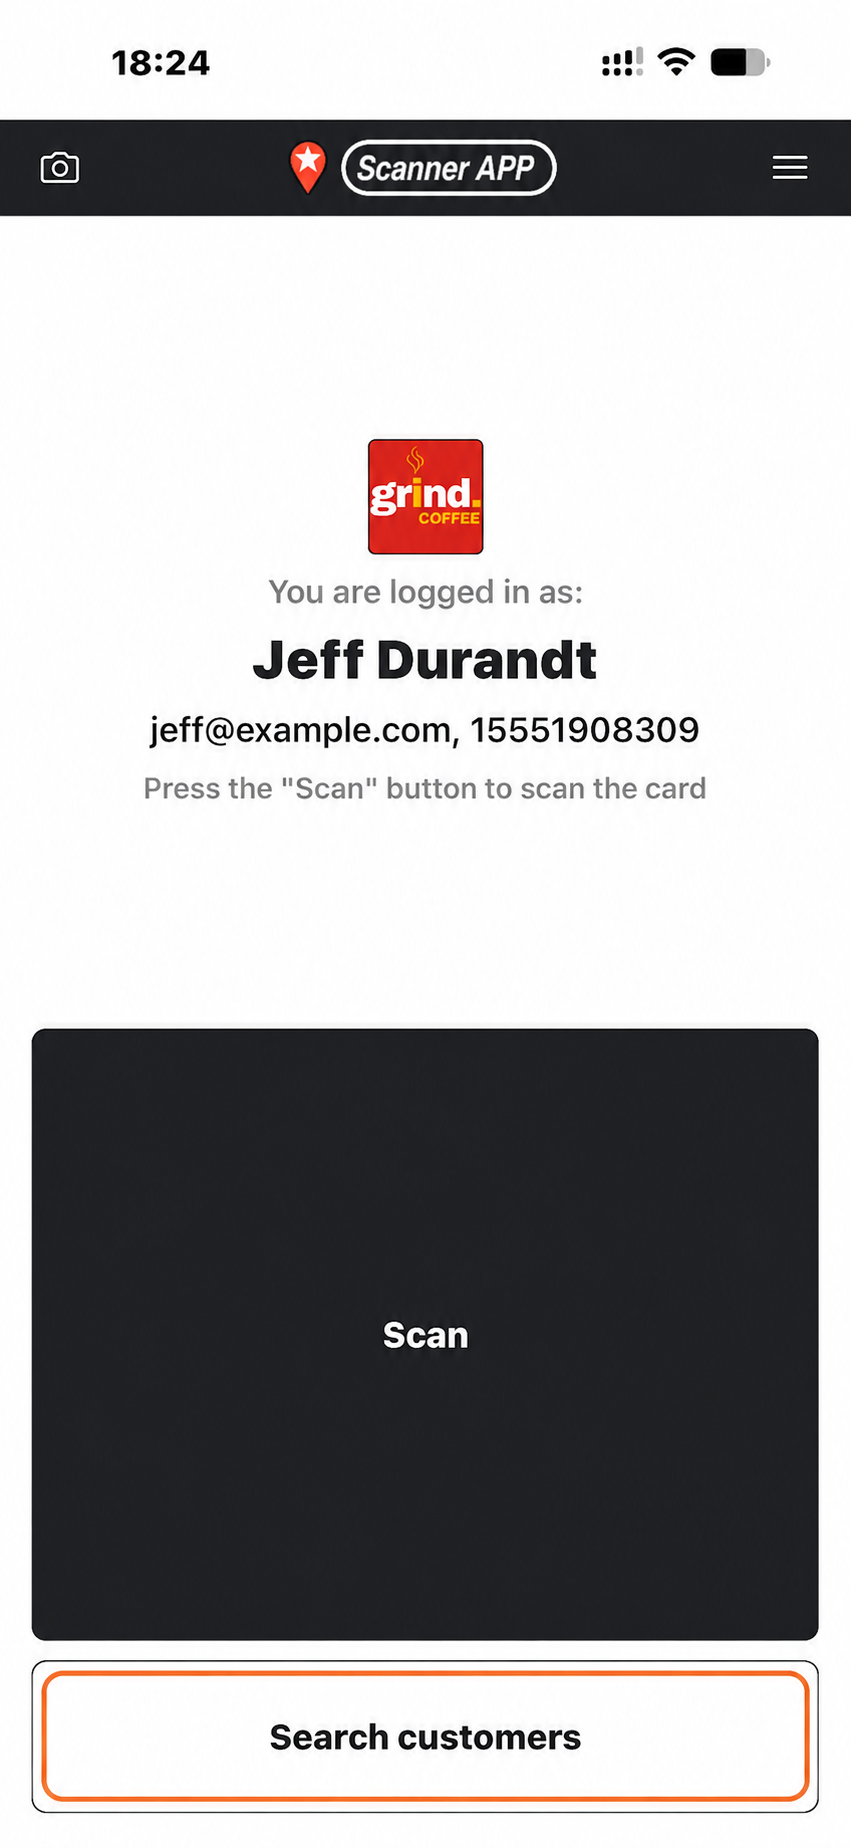
- Check the account shown on the home screen before serving a customer. Use Scan for a card presented on the customer's phone, or Search customers to find their card without scanning.
If you have forgotten your password, select Forgot password? on the sign-in screen. See Sign in to the Scanner App for account help.
Add a shortcut on iPhone
Adding a Home Screen icon is optional and is a separate action from signing in. It gives staff a quick way to open the Scanner App during service.
- With the Scanner App open in your iPhone browser, open the browser's sharing menu and select Add to Home Screen.
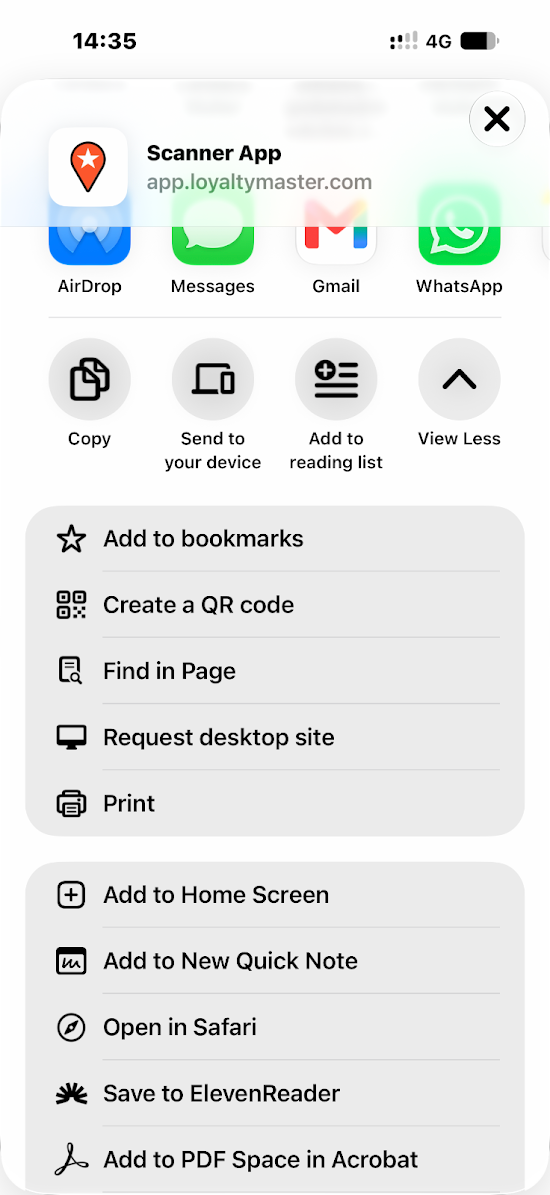
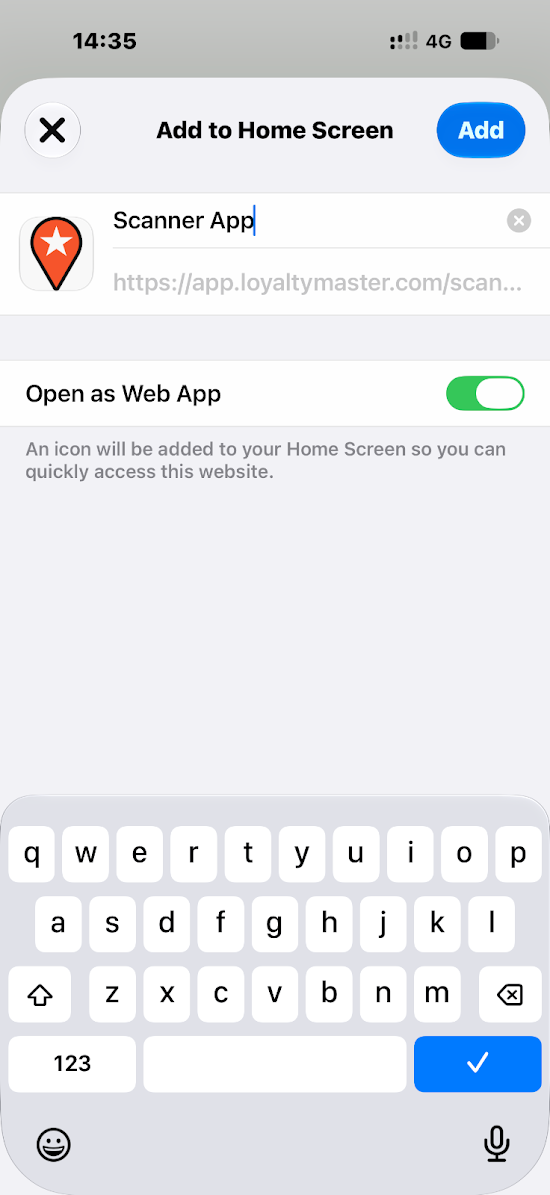
- Keep or enter the name
Scanner App. Leave Open as Web App on, then select Add in the top-right corner.
- Return to your Home Screen and open the Scanner App icon. Sign in if prompted.
These screens show the iPhone path. You can also open the Scanner App directly in a browser without adding a shortcut.
Find your customer
Make sure you are signed in to the Scanner App with your manager username (email address) and password. The screen and available actions can differ depending on your phone, the customer's card type and your card settings.
Choose how to find the customer:
- Scan: select Scan and point the camera at the QR code on the customer's loyalty card. The first time you scan, allow camera access if prompted. The Scanner App scans the code and shows the customer's details.
- Search: select Search customers, below the large Scan button at the bottom of the screen.
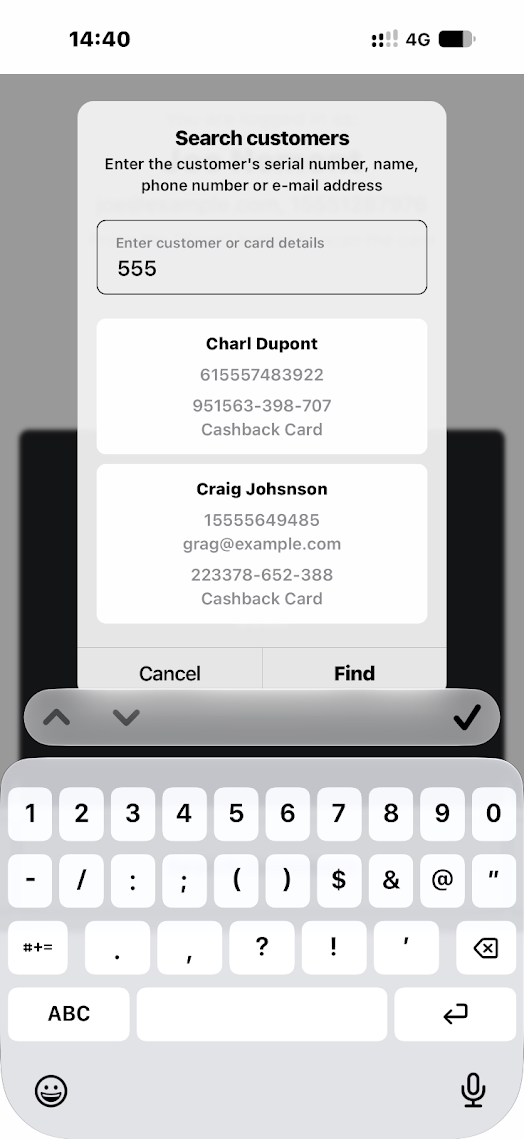
Search by phone, name, surname or loyalty card serial number
- Ask the customer for their mobile phone number and type part of it into Enter customer or card details. You do not need the full number. This is usually the quickest way to find them. You can also search by first name, surname, email address or card number.
- If more than one result appears, check the name, phone number and card details, then select the correct customer. Check that you have opened their intended card before continuing. If needed, enter more of the phone number to narrow the results.
Add or redeem a reward
Once the customer's card is open, follow the transaction for that card type. For example, a Reward card can ask for the purchase amount before you select Add points. A redemption can ask you to choose an available reward.
- Check the customer and choose the action or reward they need. Enter the amount requested for that transaction.
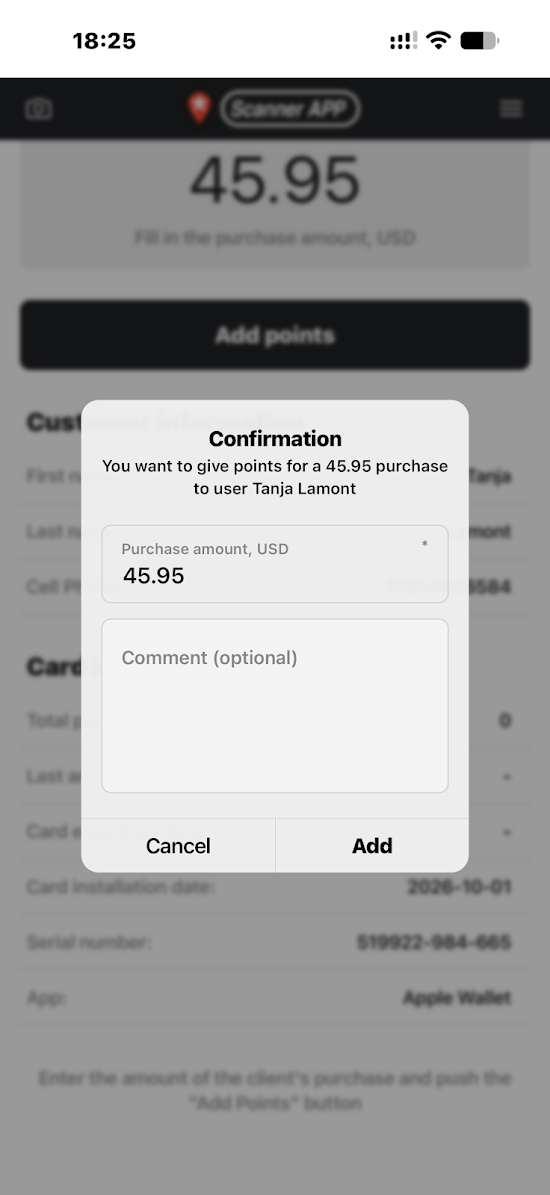
- Review the separate Confirmation screen, then select Add or Redeem as appropriate. You can normally continue without typing anything else. A comment is optional unless your business has made it required. If a purchase amount is required, enter it if blank or check the amount already filled in.
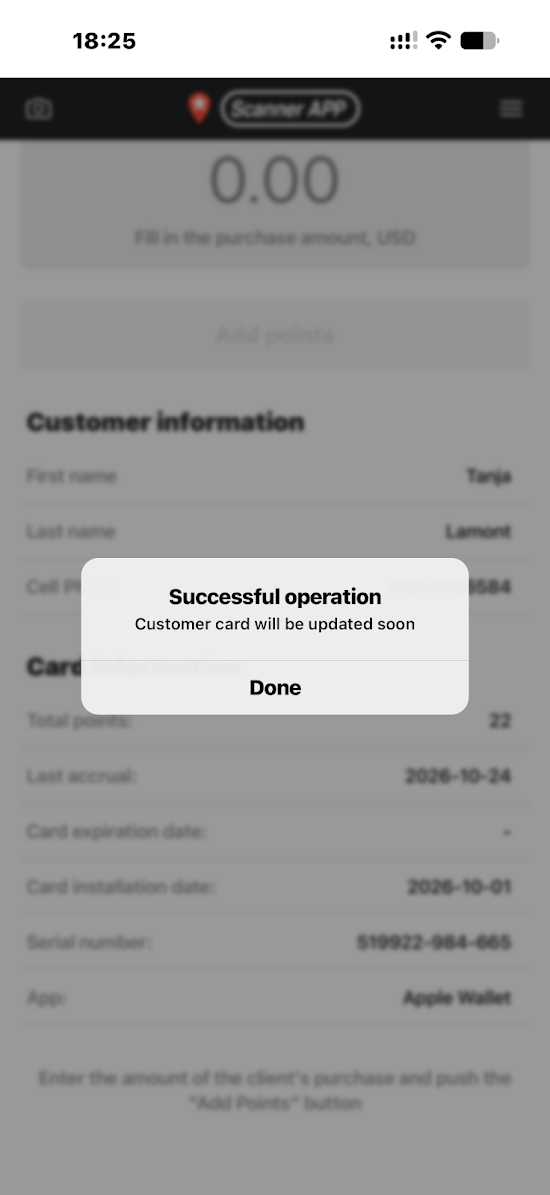
- When Successful operation appears, select Done. The message says the customer's card will be updated soon. Check the resulting balance or reward before starting another transaction.
Example: add points for a purchase
This Discount card example uses a 45.95 USD purchase. Enter the customer’s actual purchase total in the currency shown. The card’s settings determine its spending thresholds and discount levels.
- Select Add, enter
45.95in the purchase-amount field, then select Add points.
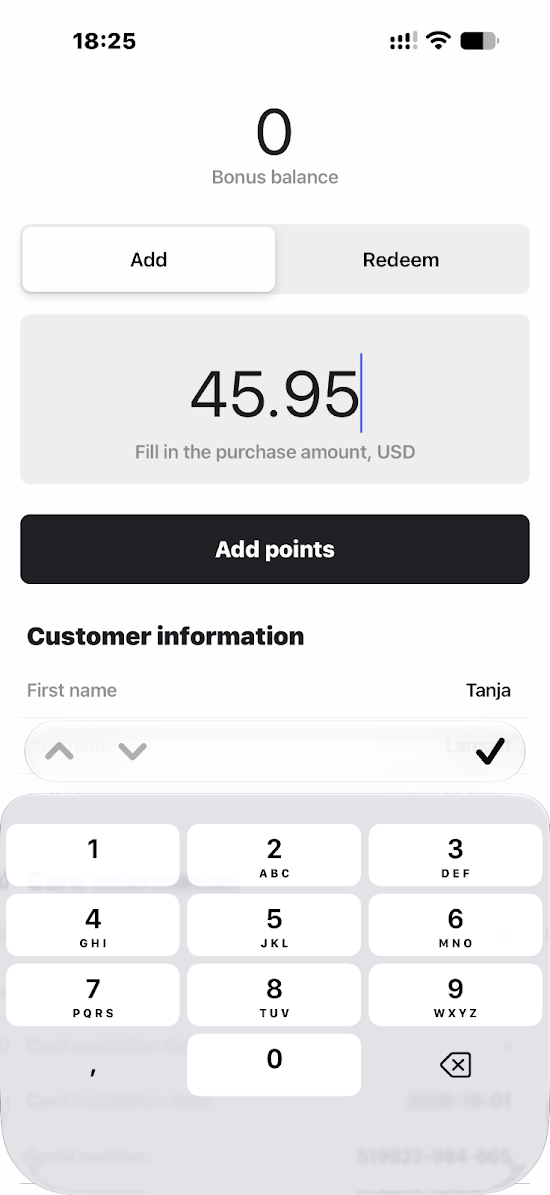
- On Confirmation, check the customer and purchase amount. Comment (optional) can be left empty in this example. Select Add to confirm, or Cancel to go back without confirming.
- The Successful operation message says the customer's card will be updated soon. Select Done, then check the card's balance.
For the full counter procedure, see Scan and make transactions, Cashback transactions, or the Reward card example.
Choose scan settings
Open the three-line menu in the top-right corner, then select Settings. Under WHEN SCANNING A QR CODE, use the switches to choose the scan feedback you want:
| Setting | What it is for |
|---|---|
| Beep | Sound feedback when scanning a QR code. |
| Show result | Displaying the scan result. |
| Copy to clipboard | Copying the scanned code so it can be pasted elsewhere. |
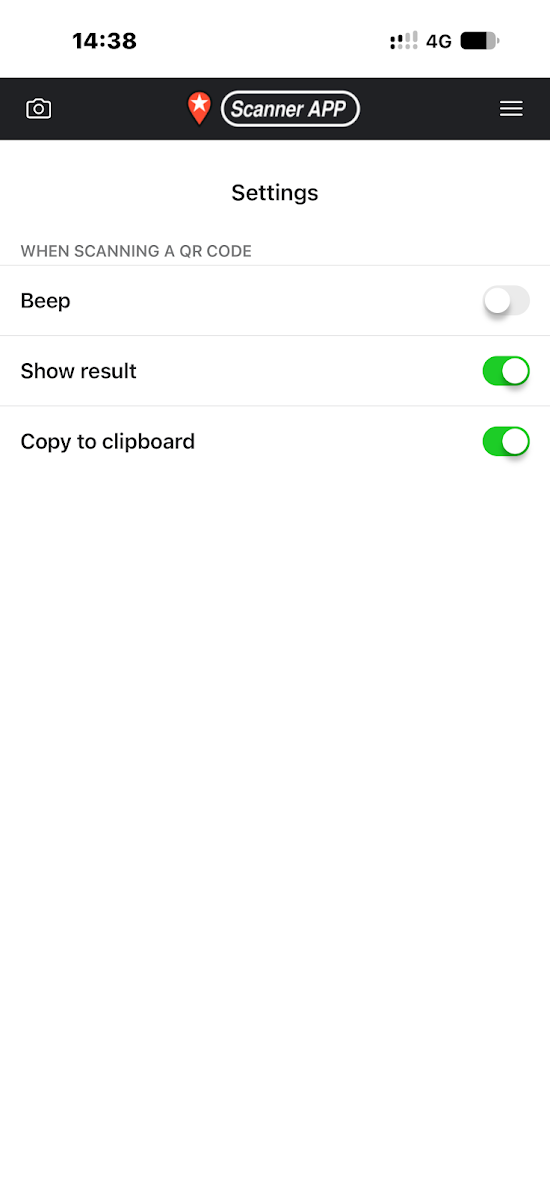
The switches shown are example choices. Choose the feedback that suits your counter workflow.
Use loyalty alongside your till
If your POS is not connected to Loyaltymaster, record the sale and loyalty action separately. Follow Use Loyaltymaster with your POS without an integration to set up a checkout routine and compare the records.
Need help?
If anything is unclear, get help or contact our support team.
You can also open the Scanner App’s three-line menu and select Support. If you cannot sign in, ask the business owner to check your manager account.