How to Create a Cashback Card
Create a cashback card and configure its rewards, design, and customer-facing information.
Application review pending. Current permissions and product version are unverified.
On this page
Create a Cashback card for your business, from choosing the cashback rate to getting the installation link. Start in your merchant account under Cards and use From scratch.
The illustrations use example settings, business details and terms. Use your own offer, artwork and contact details. Panels are enlarged for clarity; select View larger image to inspect a control.
Before you start
Cashback returns a percentage of a purchase as points that customers can use later. Choose the cashback rate, where the card can be used, and when the card and points expire. Welcome, birthday and referral bonuses are separate, optional rewards.
Have your logo, business contact details and offer terms ready. The illustrated values are examples, not recommended defaults.
- Sign in to your merchant account and select Cards in the left-hand menu.
- Select Create card, then From scratch. Enter a Card name so you can identify it in your account.
- Work through Card type, Settings, Design and Information, then save and preview the card.
Card Type
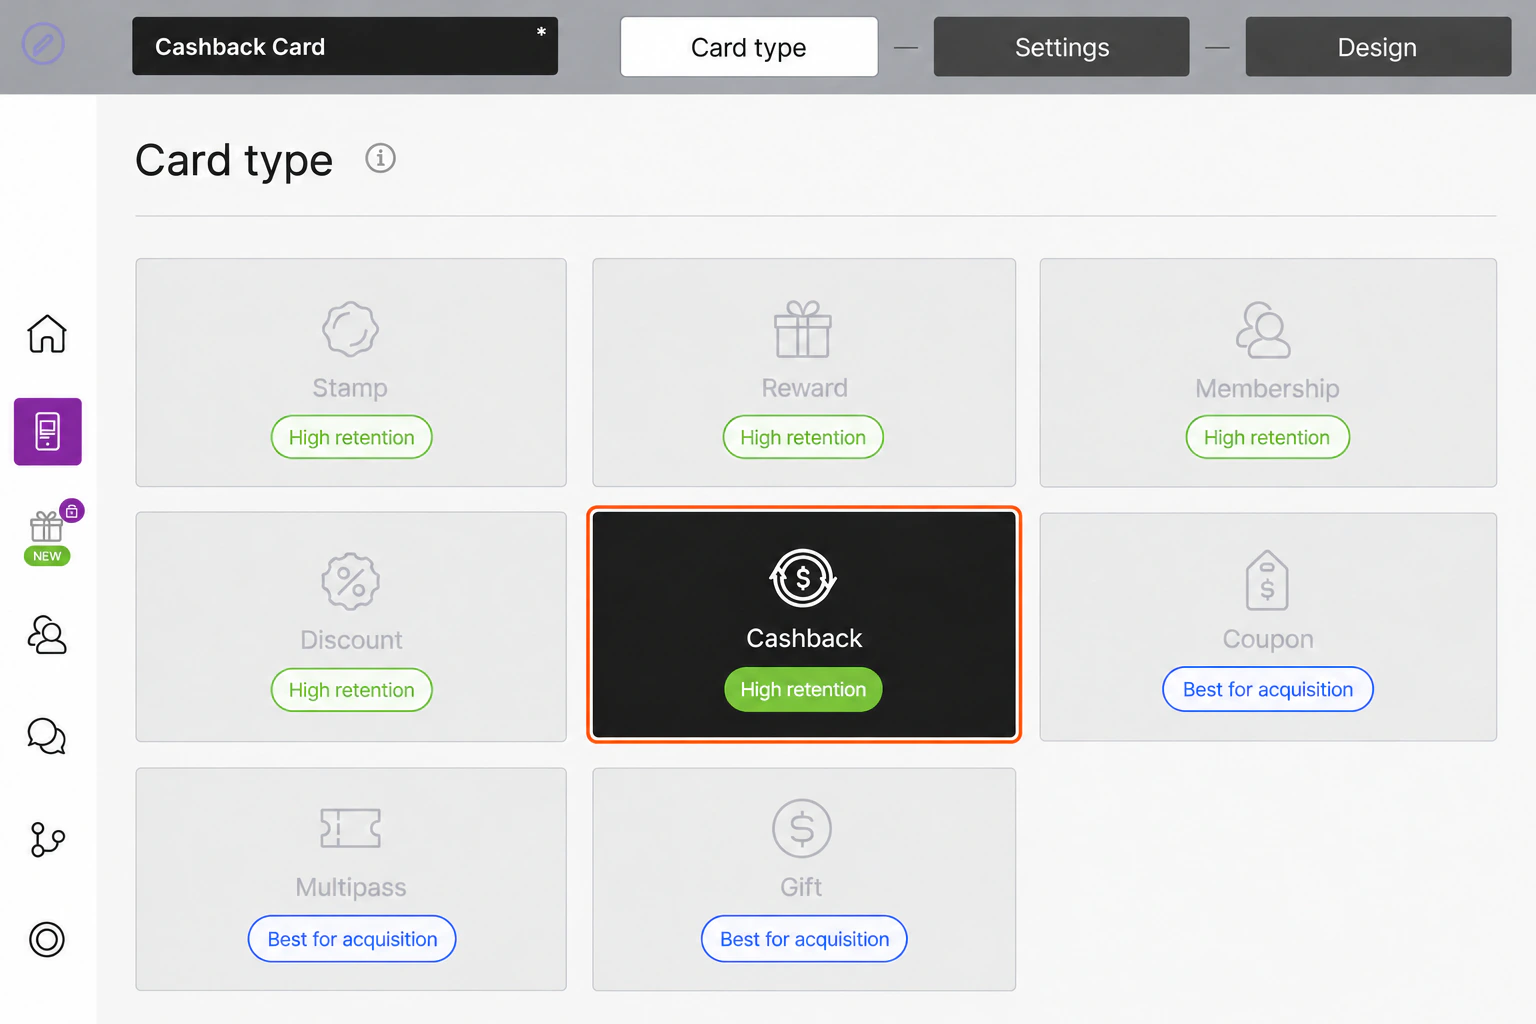
- Open Card type and select Cashback. On an existing card, this choice may be locked; start a new card if you need a different type.
- Use Continue to proceed to Settings.
Settings
Barcode and optional promotions
Choose Barcode type for the scanning method your staff will use. The example uses QR Code; PDF 417 is also available.
Use Happy hours only if your offer includes a scheduled multiplier. Set Multiplier ×, From, Till and the applicable days, then use Add for the schedule. Use Promotions and Create promotion only for a separate promotional offer. For a basic offer, leave these optional additions unconfigured.
Expiry and locations
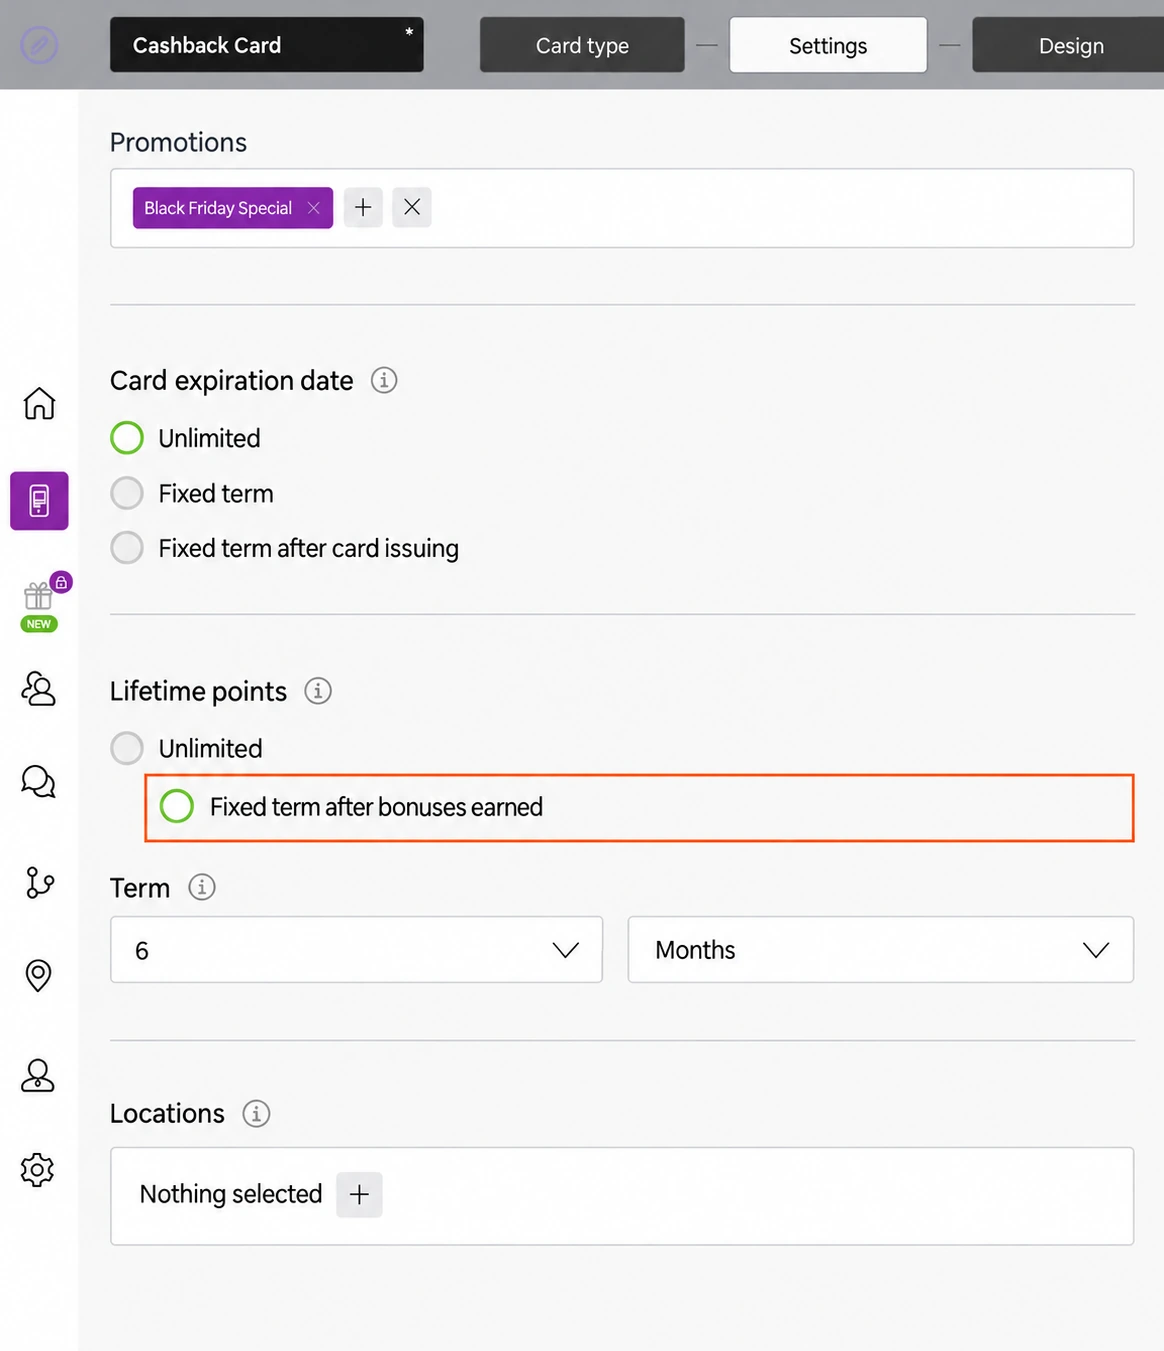
- Set Card expiration date: Unlimited, Fixed term, or Fixed term after card issuing, according to how long the card should remain valid.
- Set Lifetime points separately. Choose Unlimited, or Fixed term after bonuses earned and enter the Term value and unit. The example is 6 Months. Each amount earned then expires six months after its own earning date; a later purchase does not extend earlier points. Keep this separate from the card expiry.
- Use Locations to choose where customers can use the card. If no locations exist, the editor offers Add location; prepare the locations needed for your offer before selecting them.
Tiers and regional formats
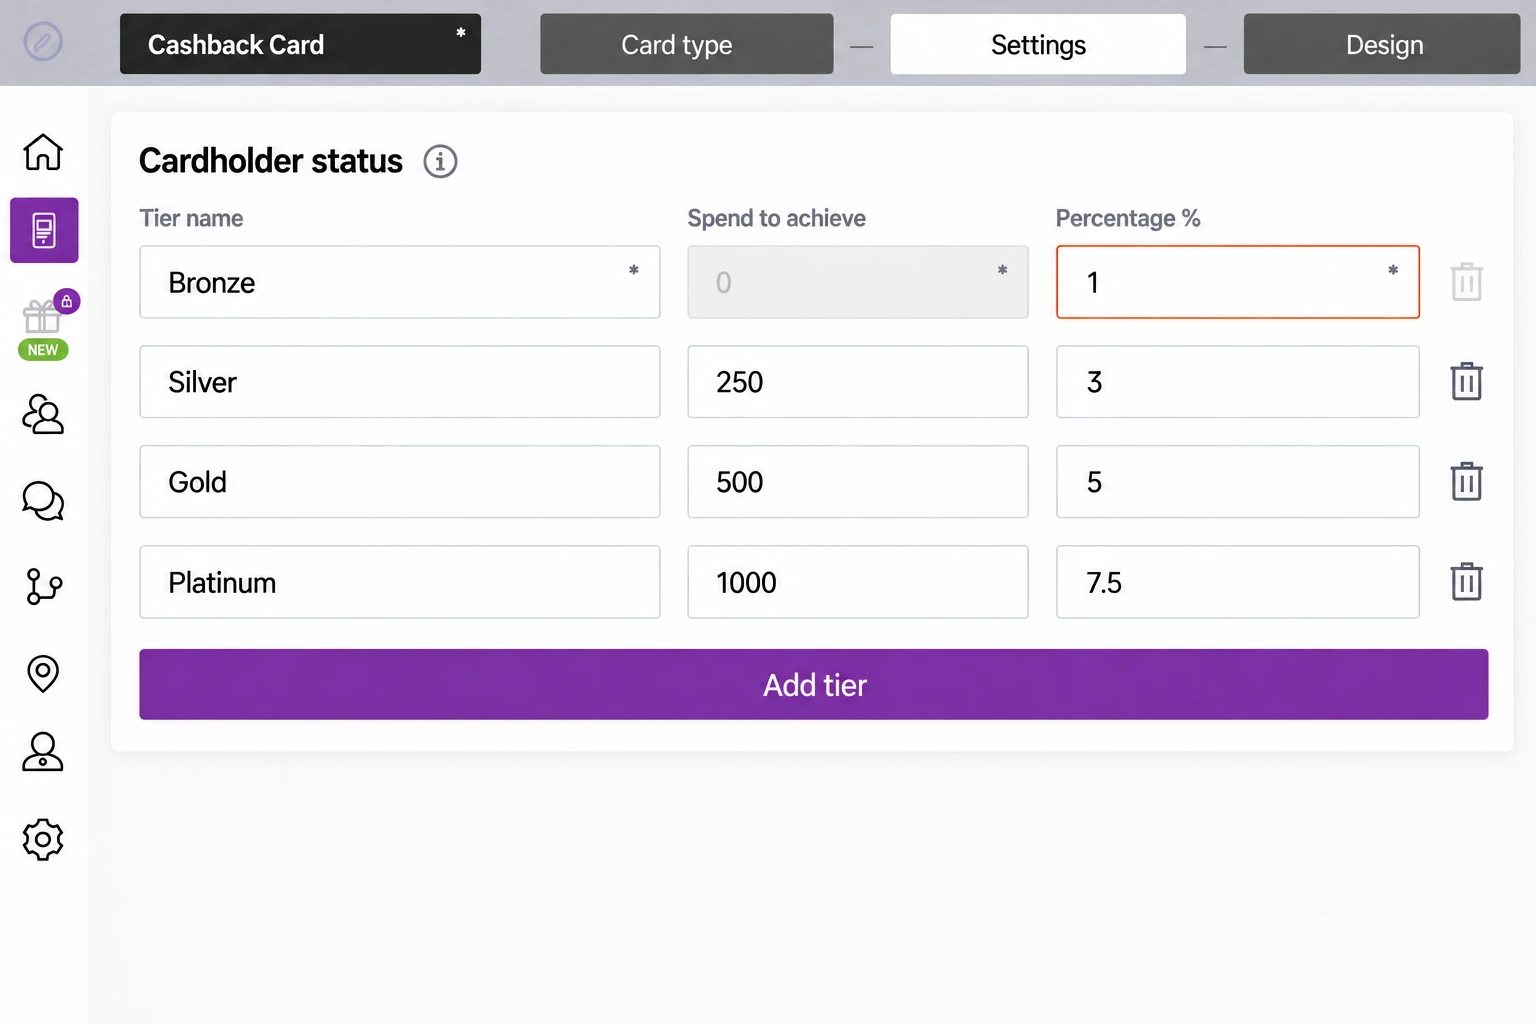
- Under Cardholder status, enter a Tier name, the Spend to achieve threshold and the cashback rate in Percentage %. The spending threshold determines when a customer qualifies for that tier; the percentage is the part of each purchase returned as cashback points. Enter 1 for a 1% rate, not 0.01.
- Select Add tier if you want customers to earn a higher rate after reaching another spending threshold. For example, the illustration uses Bronze at a threshold of 0 with 1% cashback, then Silver at 250 with 3%, Gold at 500 with 5% and Platinum at 1000 with 7.5%. These are total recorded spending thresholds, not minimum amounts for individual purchases. Use a row's trash icon to remove an unwanted tier; the first row's removal and spending controls are disabled in the example.
- Choose Language, then Date format, Thousands Separator and Decimal Separator to match the language and number format your customers use.
Scanner requirements and signup fields
Under Purchase amount when charging, turn on Purchase amount is required in Scanner App if staff should enter a purchase amount. Under Comment when accruing, turn on Require a comment when crediting if staff should record a reason.
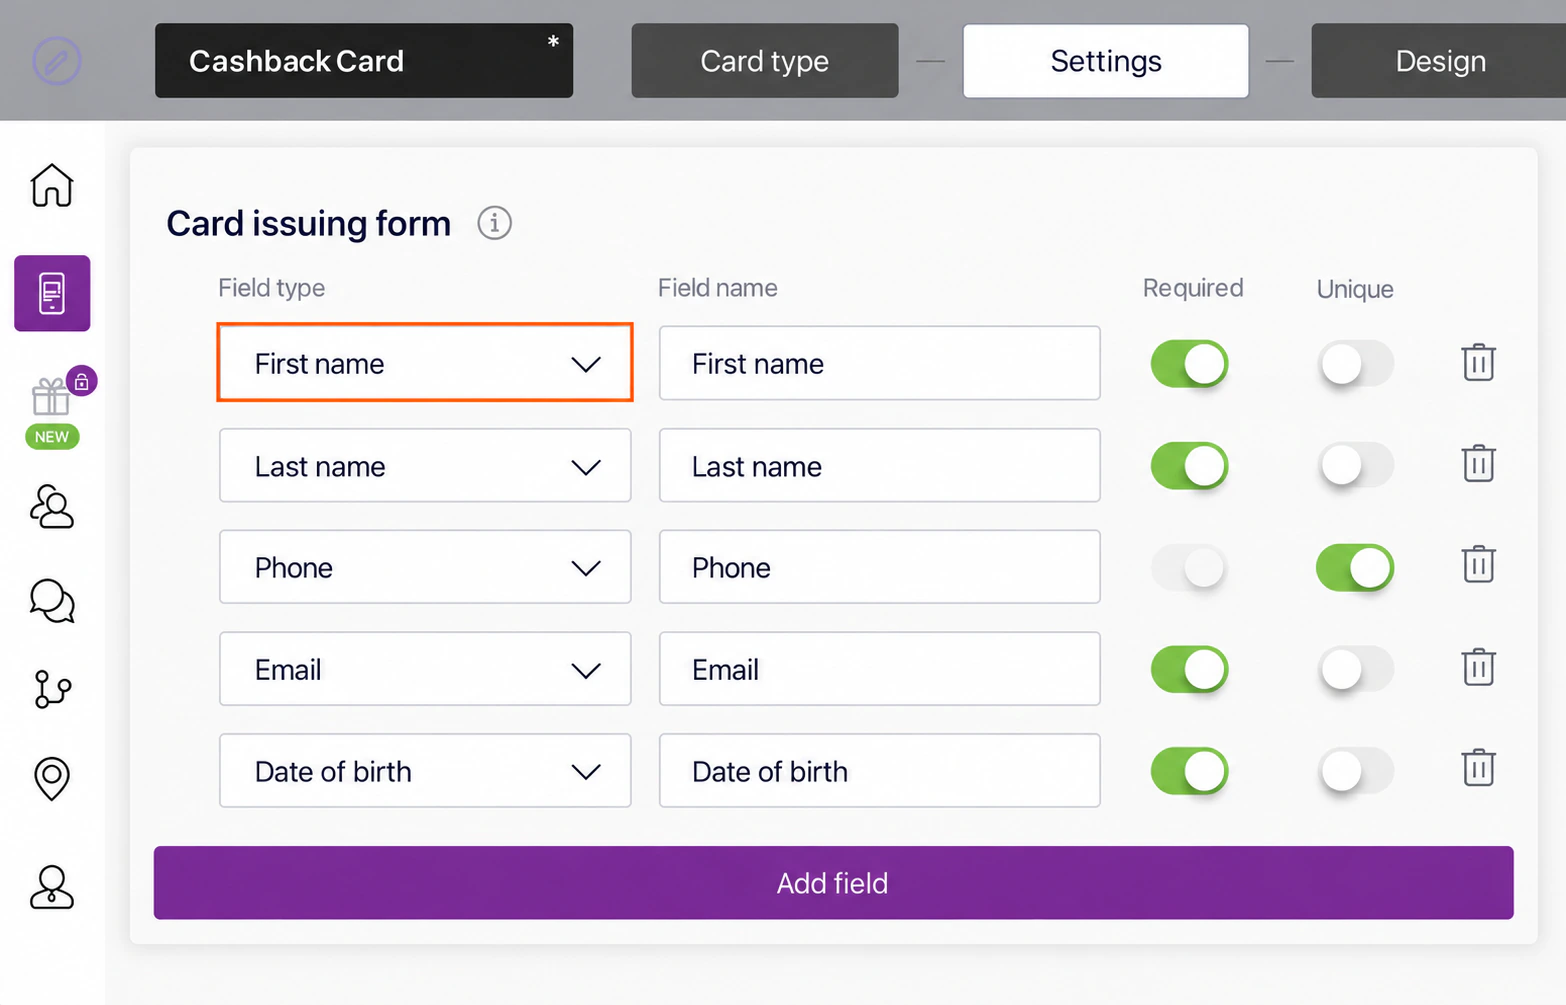
- Under Card issuing form, choose the information customers provide when installing a card.
- Choose each Field type and enter its customer-facing Field name.
- Turn on Required for fields customers must complete. Turn on Unique for a field that should contain a unique value.
- Use the row's trash icon to remove a field you do not need. Select Add field, then choose its type and name, to add another.
Optional campaign links
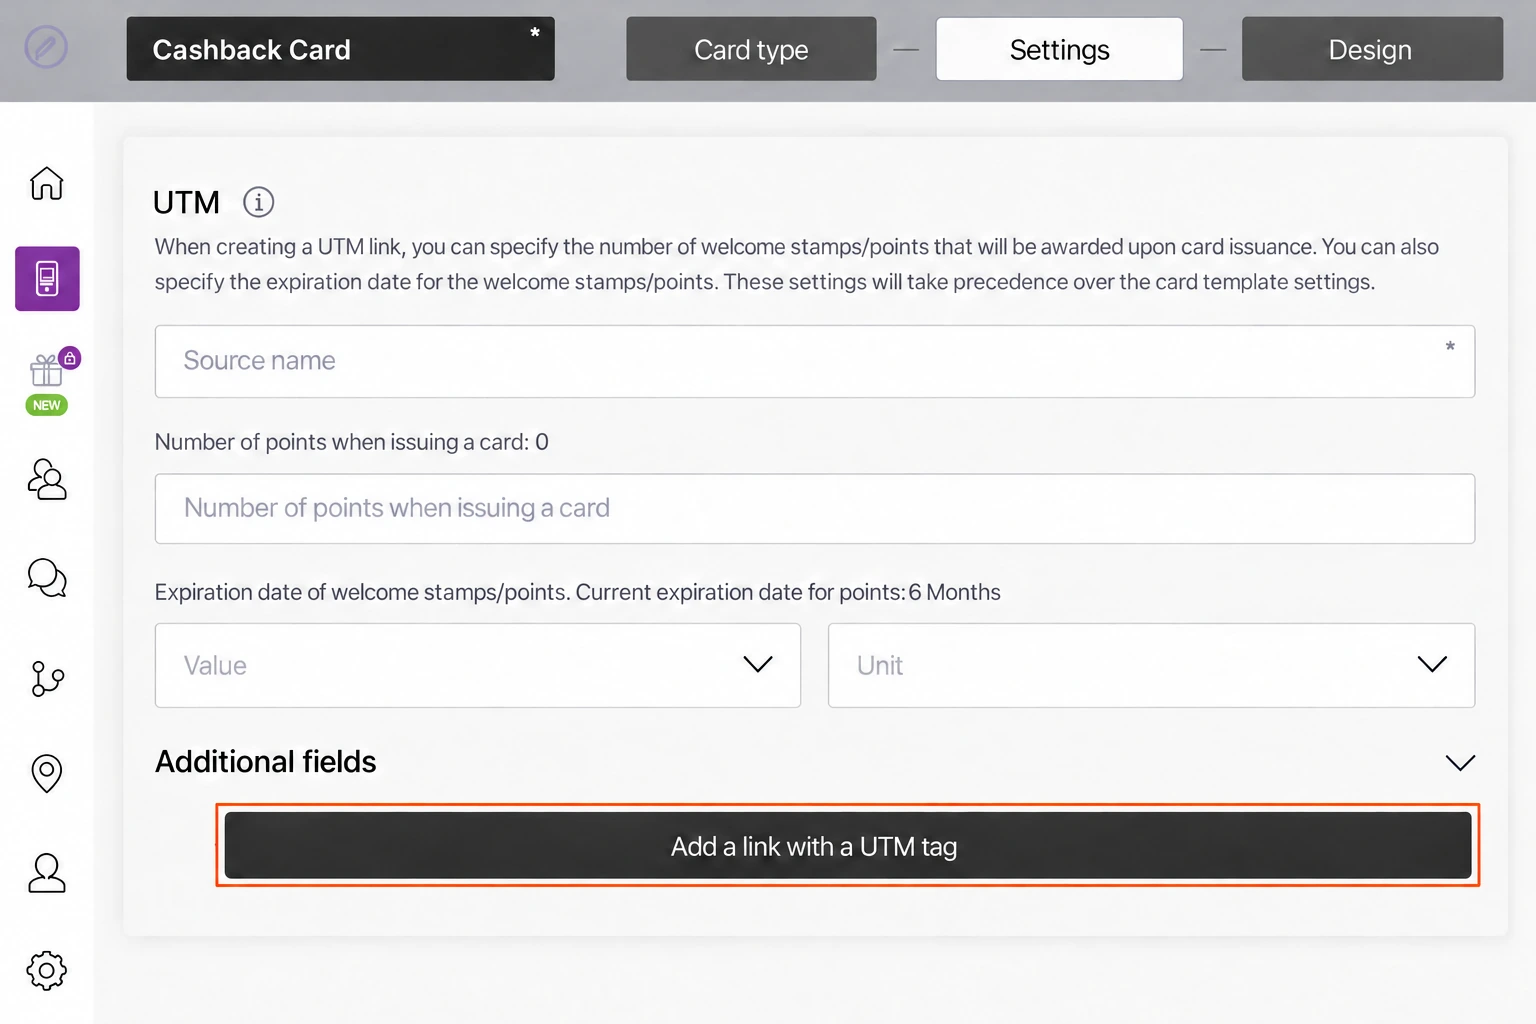
Use UTM when you need a separate installation link for a marketing channel, such as Facebook, so you can distinguish that source. Skip this section if you do not need campaign links.
- Enter the channel in Source name.
- Set welcome-point and expiry overrides only if that campaign should have a different welcome offer. These overrides take precedence over the card's settings.
- Select Add a link with a UTM tag when the details are ready.
Phone format, policy and consent
- Choose the region in Phone mask for the phone-number format you need.
- Turn on Privacy policy if you need it on the issuing form and enter your policy wording.
- If the issuing form should request consent, turn on Consent to the processing of personal data. Review Privacy policy (full text) separately and enter wording appropriate to your business.
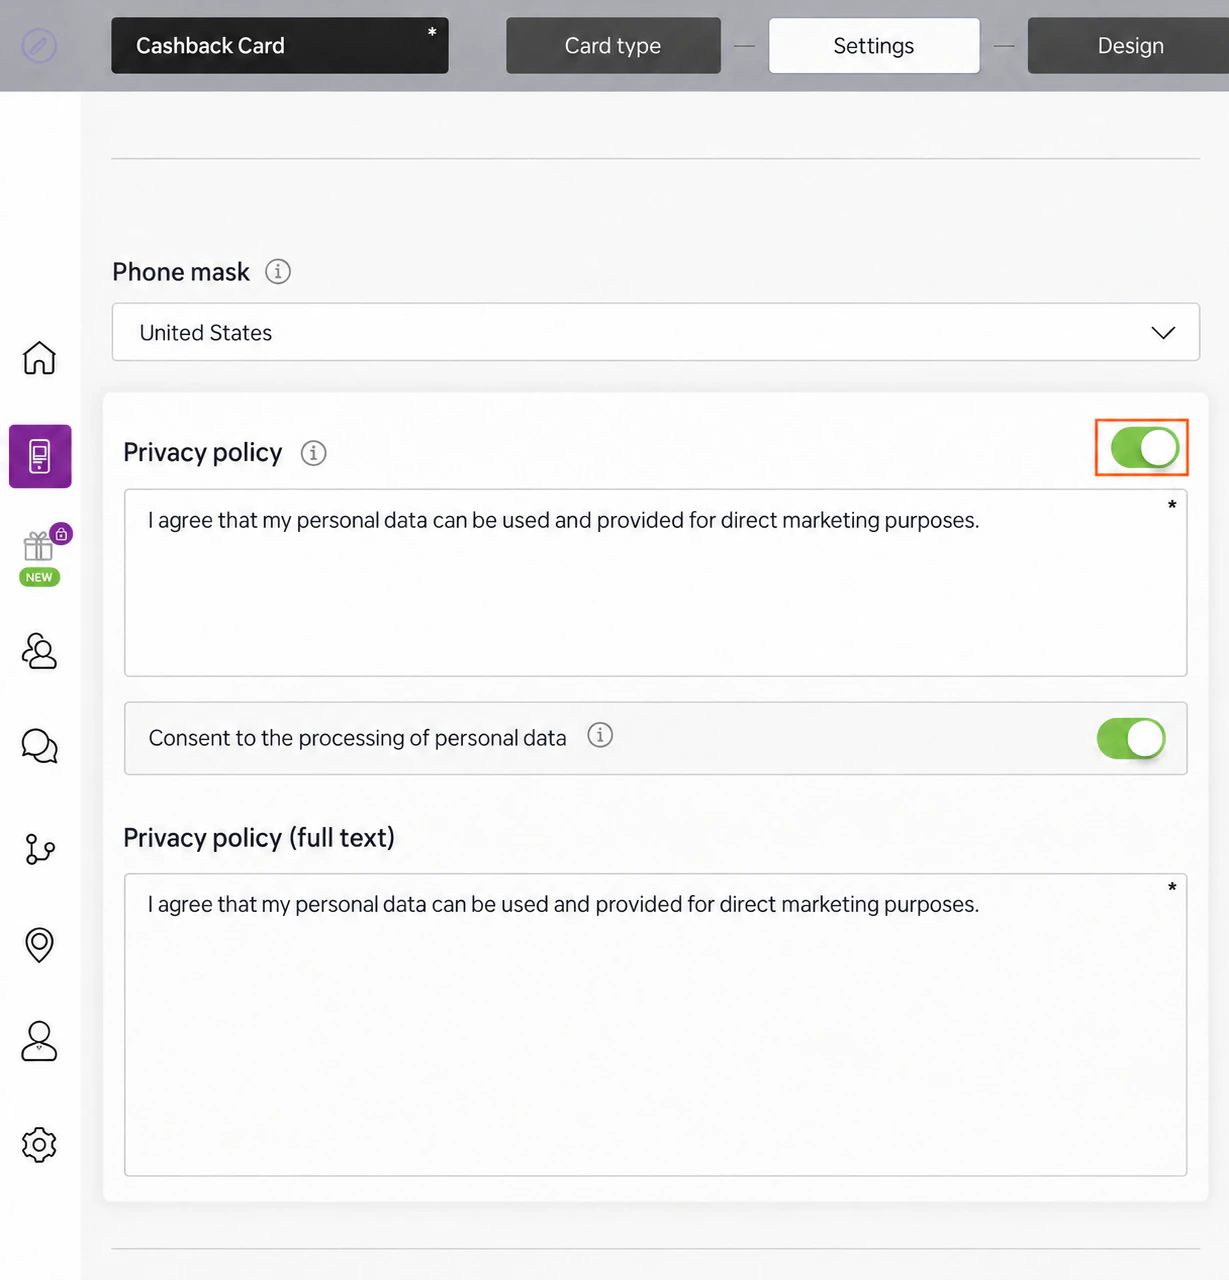
Use your own policy wording; the illustrated text is sample content.
Installation options and bonuses
- Use Google Wallet Installation button and PWA Installation button to choose which installation buttons appear on the issuing form. PWA is the web-app installation option.
- Set Limit the number of cards issued if the offer needs a cap. The editor defines 0 as unlimited.
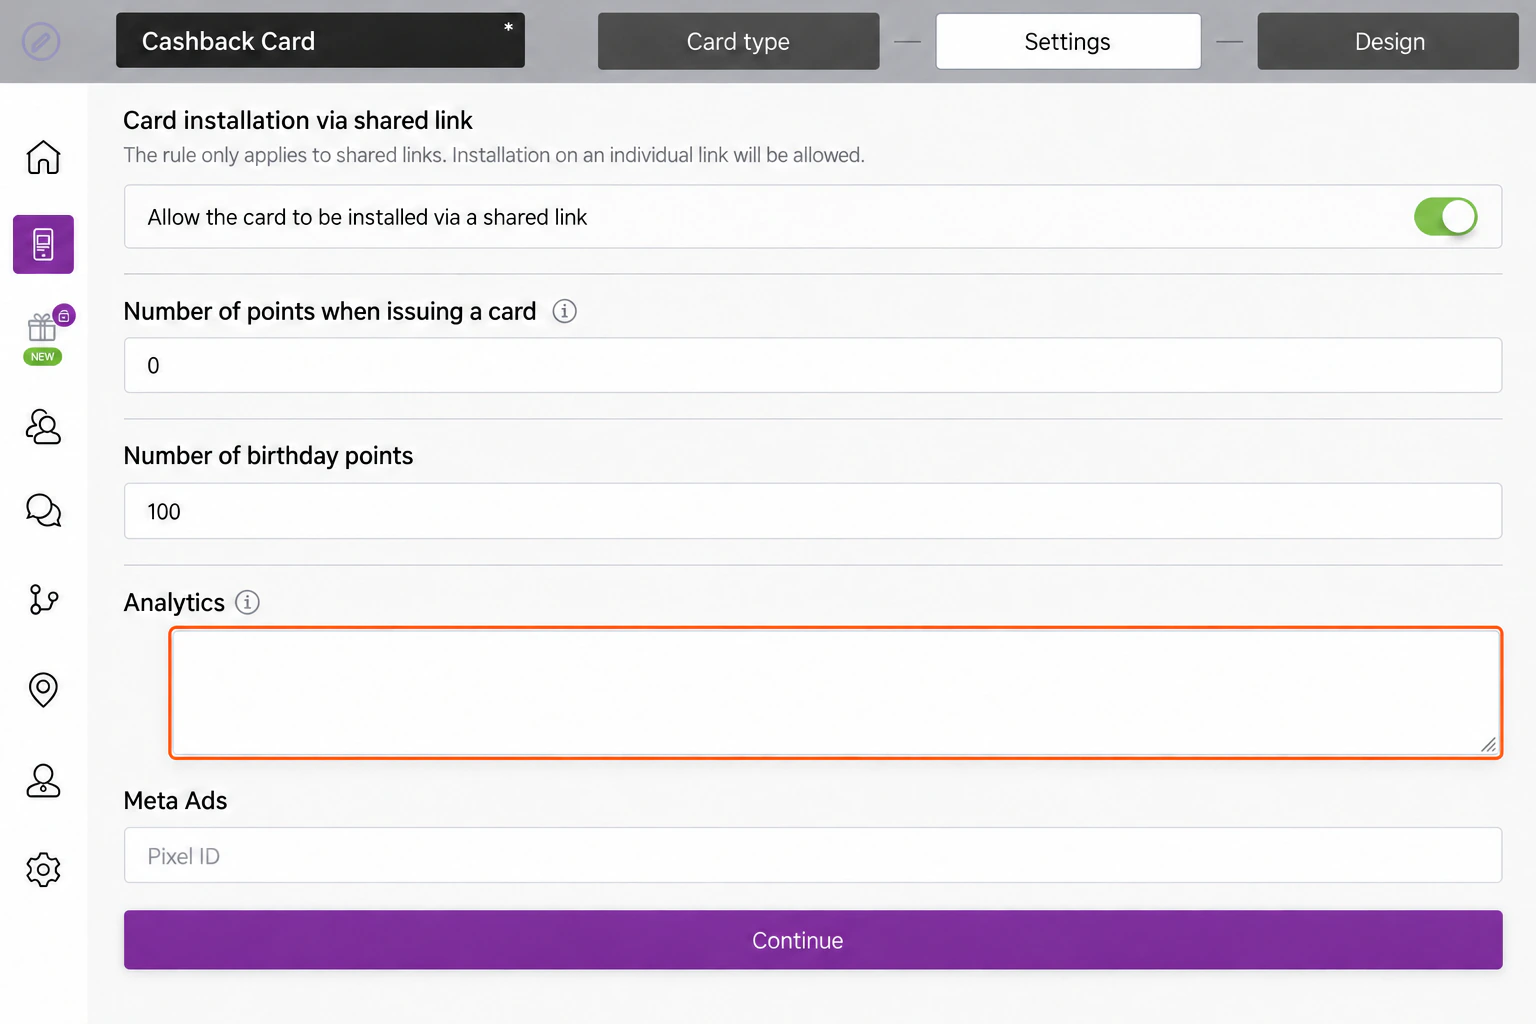
- Use Card installation via shared link to allow installation through a shared link. This setting does not block installation through an individual link.
- Under Number of points when issuing a card, enter the welcome bonus for a newly issued card. The illustration shows 0. Set Number of birthday points separately.
- If you use tracking, enter the required script in Analytics or the Pixel ID in Meta Ads. Otherwise leave these optional fields empty.
- Review Settings and use Continue to proceed to Design.
Design
Upload artwork
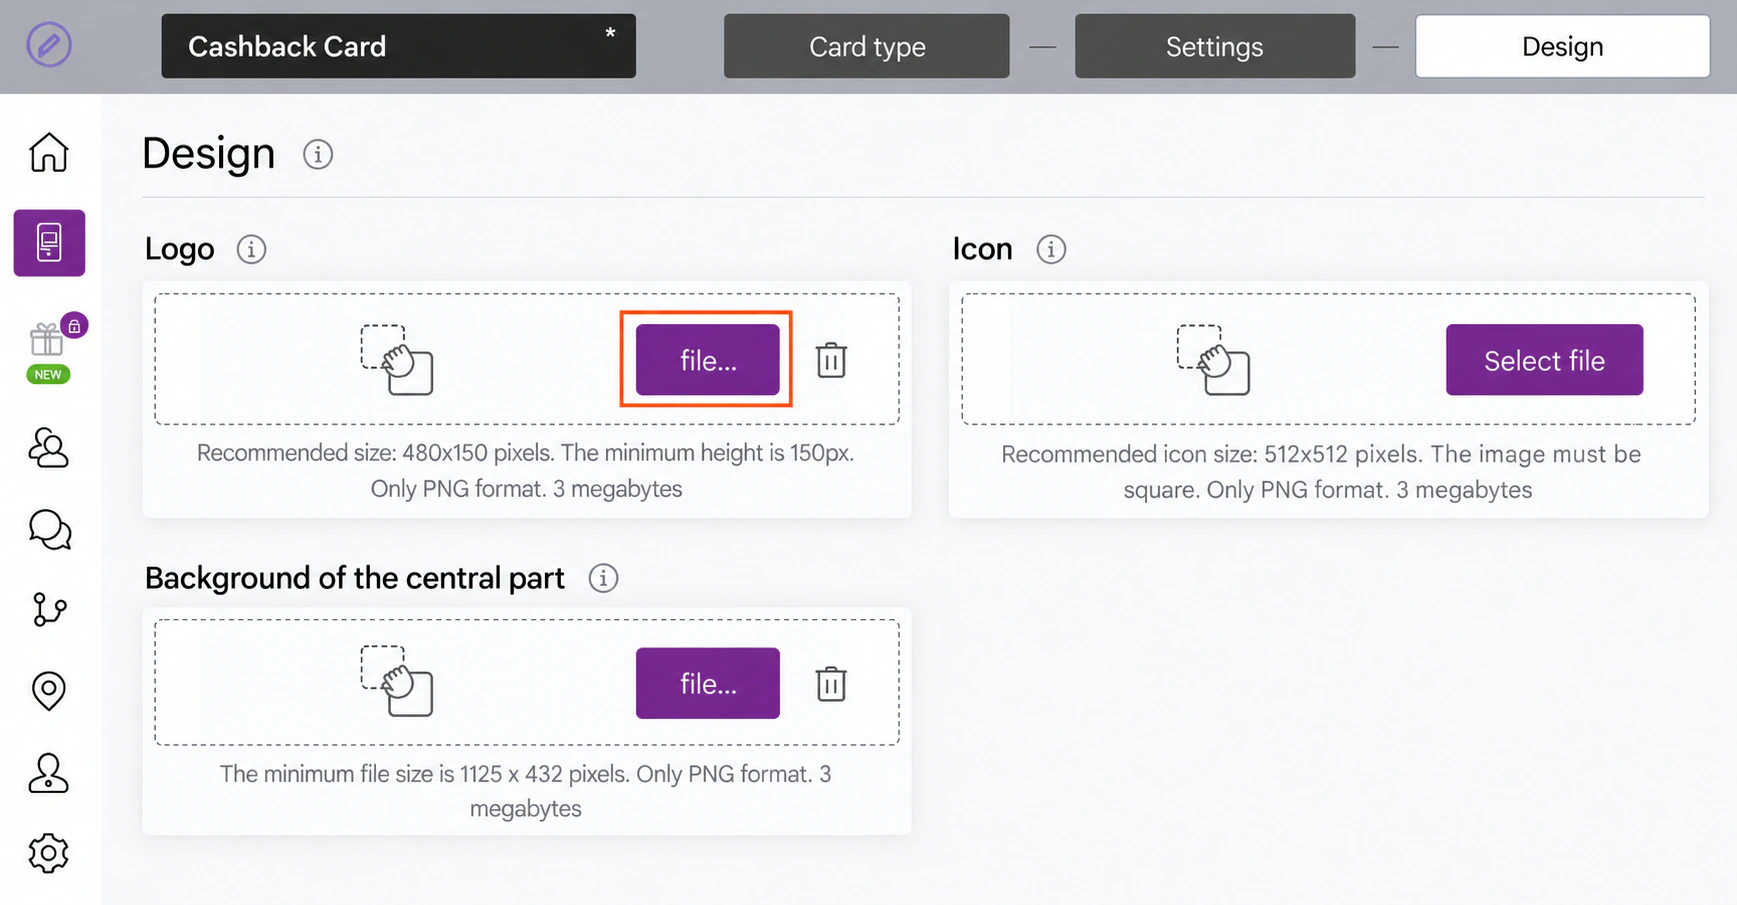
Open Design. Use the upload control under Logo, Icon and Background of the central part to choose each file. A control may display file... when artwork already exists; an empty control displays Select file. The icon is used in push messages.
- Logo: PNG, recommended 480 × 150 pixels, minimum height 150 pixels, up to 3 MB.
- Icon: square PNG, 512 × 512 pixels, up to 3 MB.
- Background of the central part: PNG, minimum 1125 × 432 pixels, up to 3 MB.
Colors and displayed fields
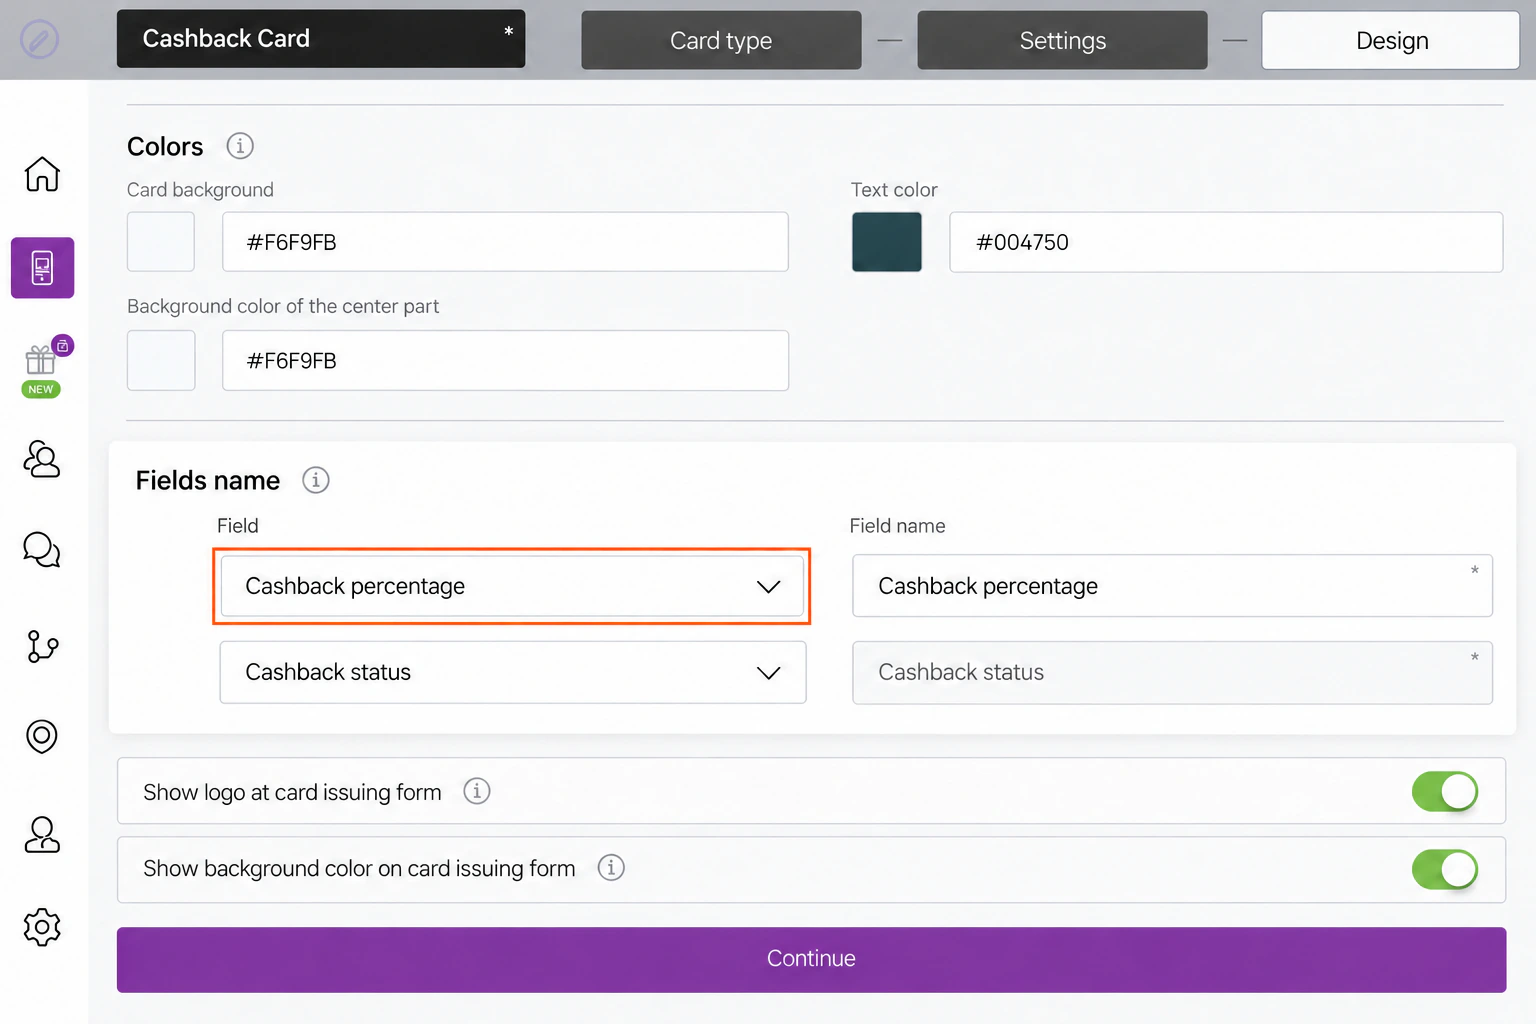
- Under Colors, set Card background, Text color and Background color of the center part.
- Under Fields name, choose the information to show using Field, then enter its customer-facing Field name. The example displays Cashback percentage and Cashback status.
- Turn on Show logo at card issuing form if you want the logo on that form.
- Turn on Show background color on card issuing form if you want the same background color there.
- Review the design and use Continue to proceed to Information.
Information
Description and business name
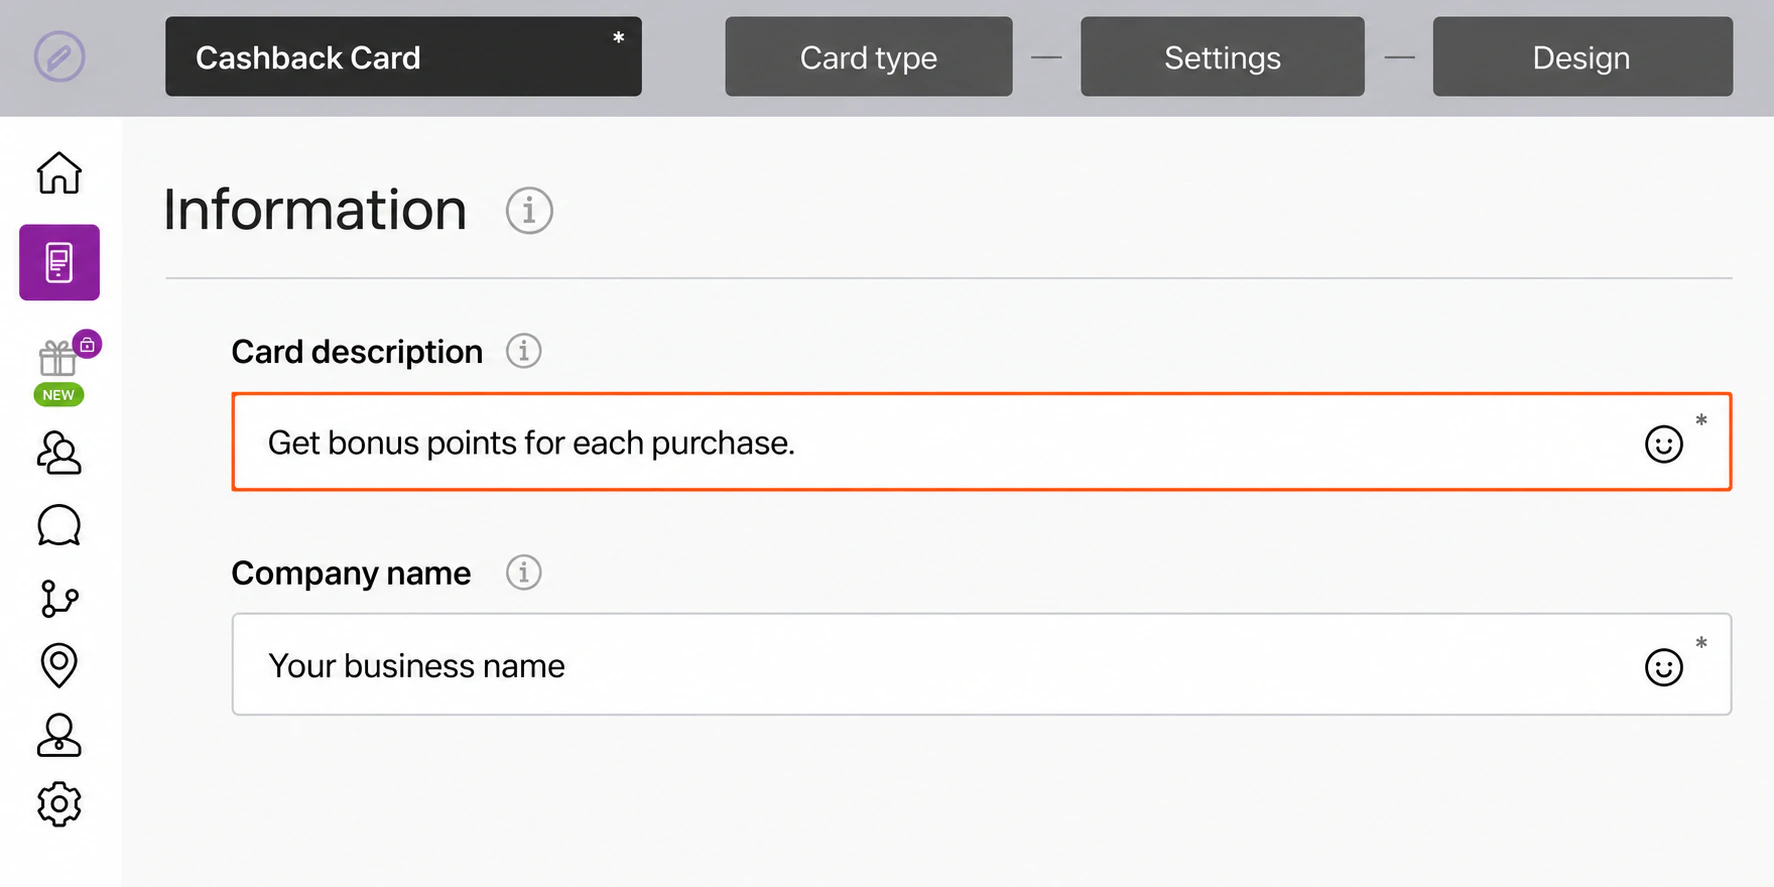
Open Information and use the phone preview to check how the card information is presented.
- Enter a short explanation of your offer in Card description.
- Enter your business name in Company name.
Optional referral rewards
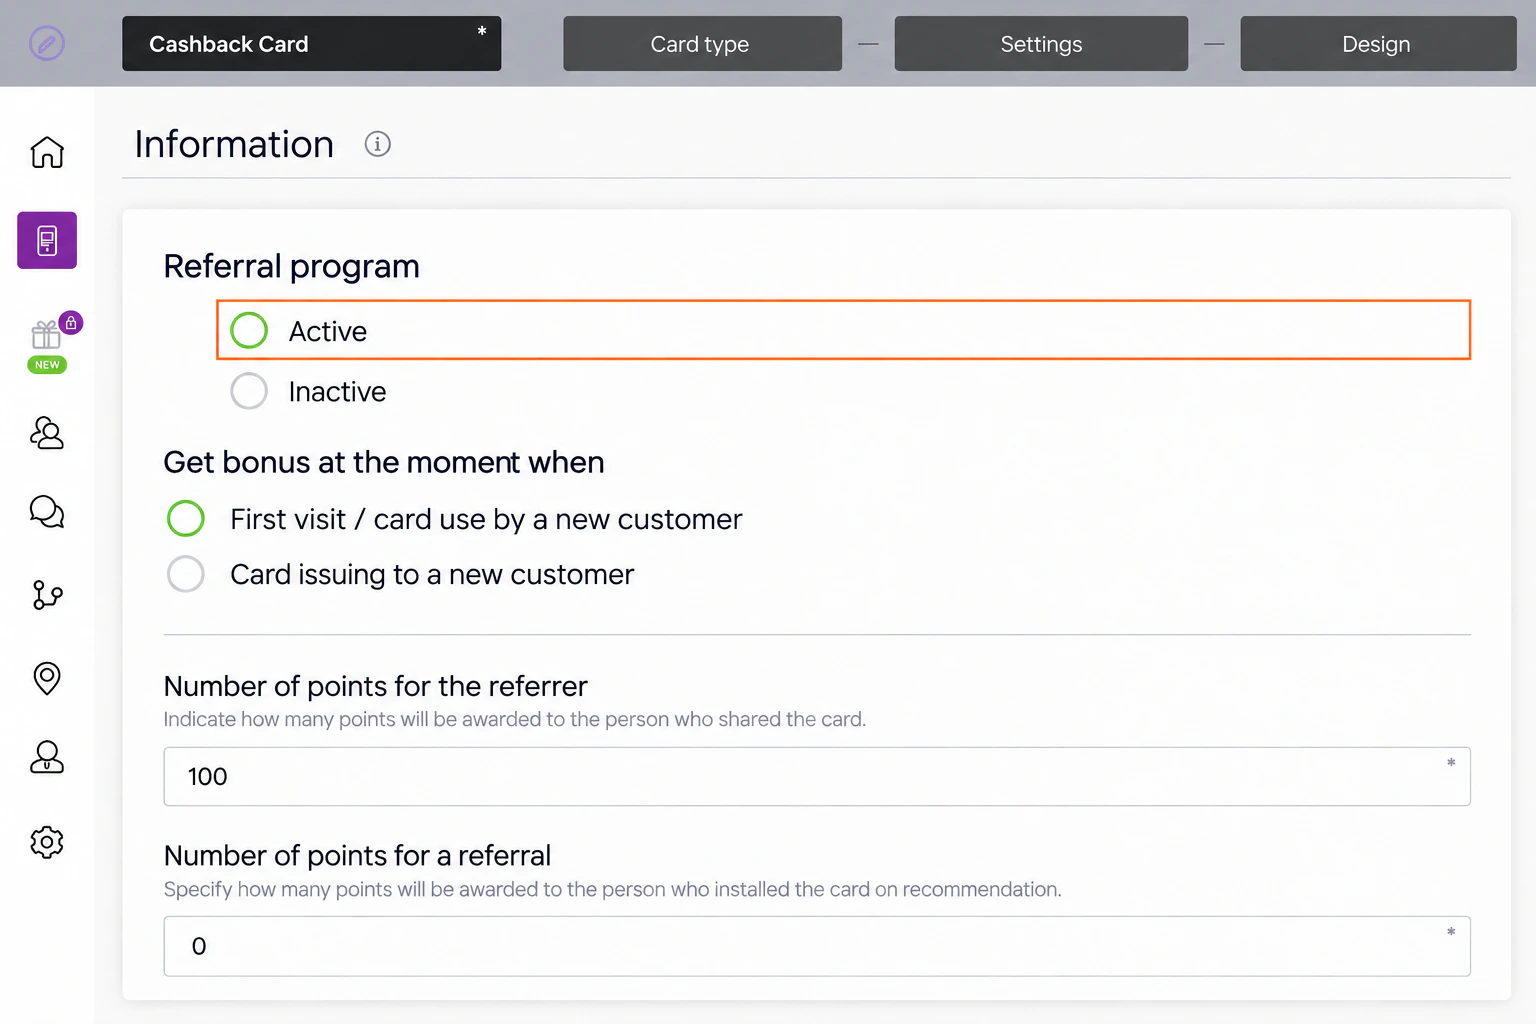
Under Referral program, choose Inactive if you do not want referral rewards. Choose Active if you do; then complete these choices:
- Under Get bonus at the moment when, choose First visit / card use by a new customer or Card issuing to a new customer.
- Enter the sharing customer's reward in Number of points for the referrer.
- Enter the new customer's reward in Number of points for a referral.
These are separate amounts. The example shows 100 for the referrer and 0 for the new customer.
Customer links
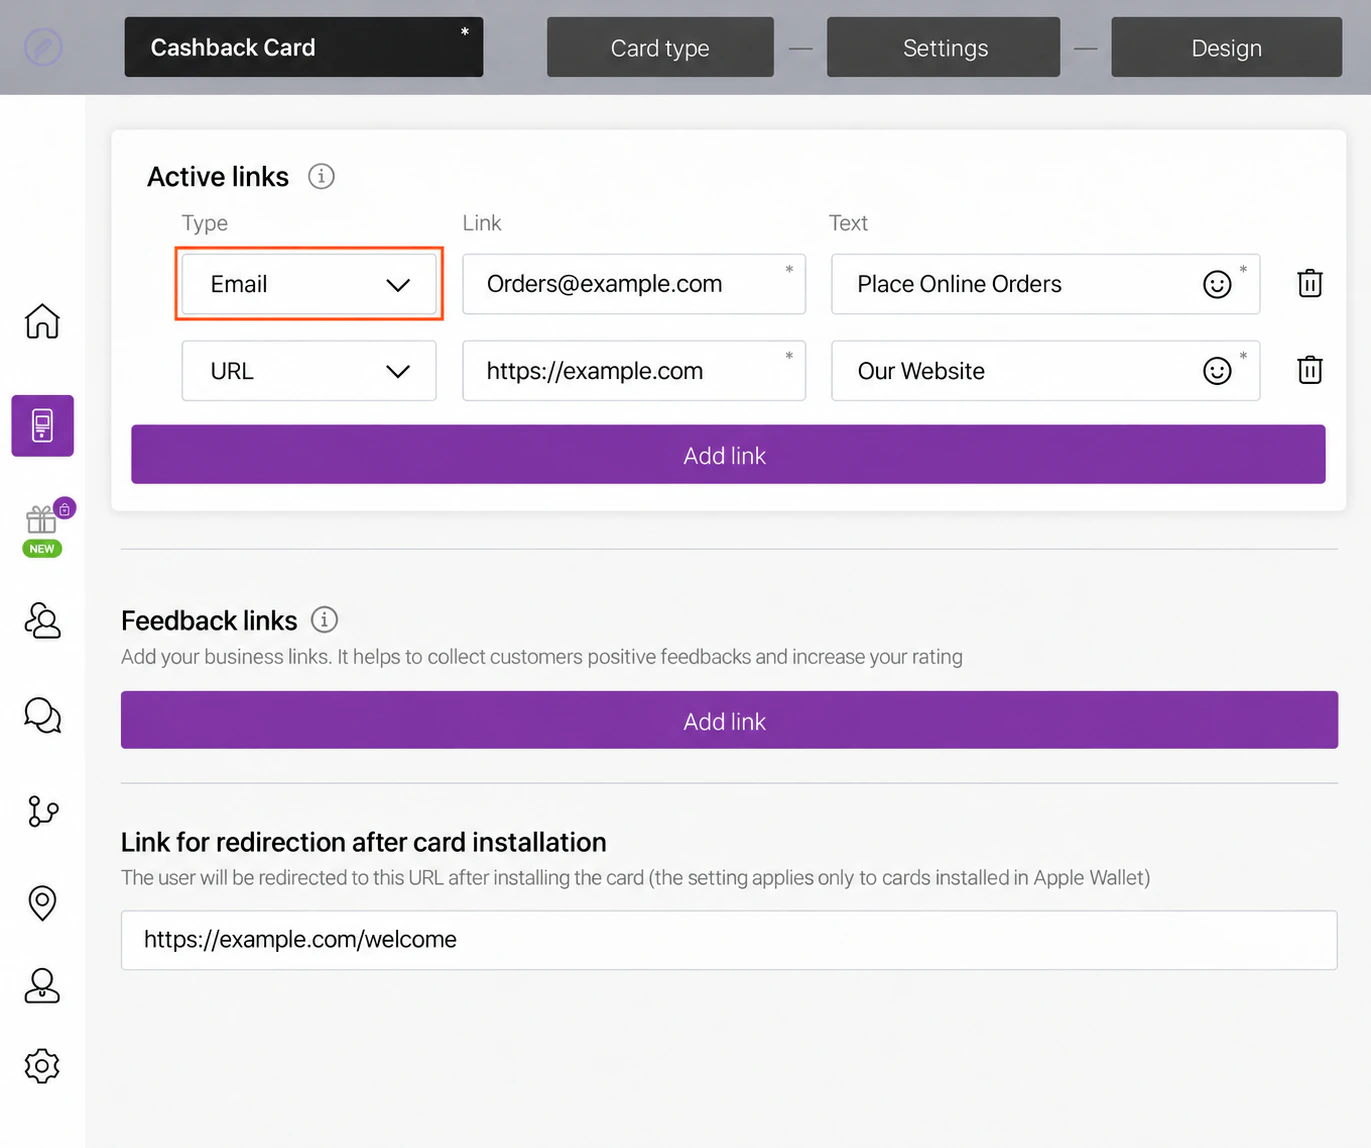
- Under Active links, choose Type: URL, Phone, Email or Address.
- Enter the destination in Link and its customer-facing label in Text. For a URL row, use your website address.
- Use a row's trash icon to remove an unwanted link. Select Add link for another row, then complete its fields.
Feedback links is optional. To include a business review link, select Add link under that heading, choose the review service from the link-type dropdown and enter your review-page address. If Add link is disabled, skip this option and contact support if you want to enable review collection.
Use Link for redirection after card installation if customers should land on a particular page afterward. This applies only to Apple Wallet installations. Replace the illustrated example.com address with your own destination.
Terms and issuer details
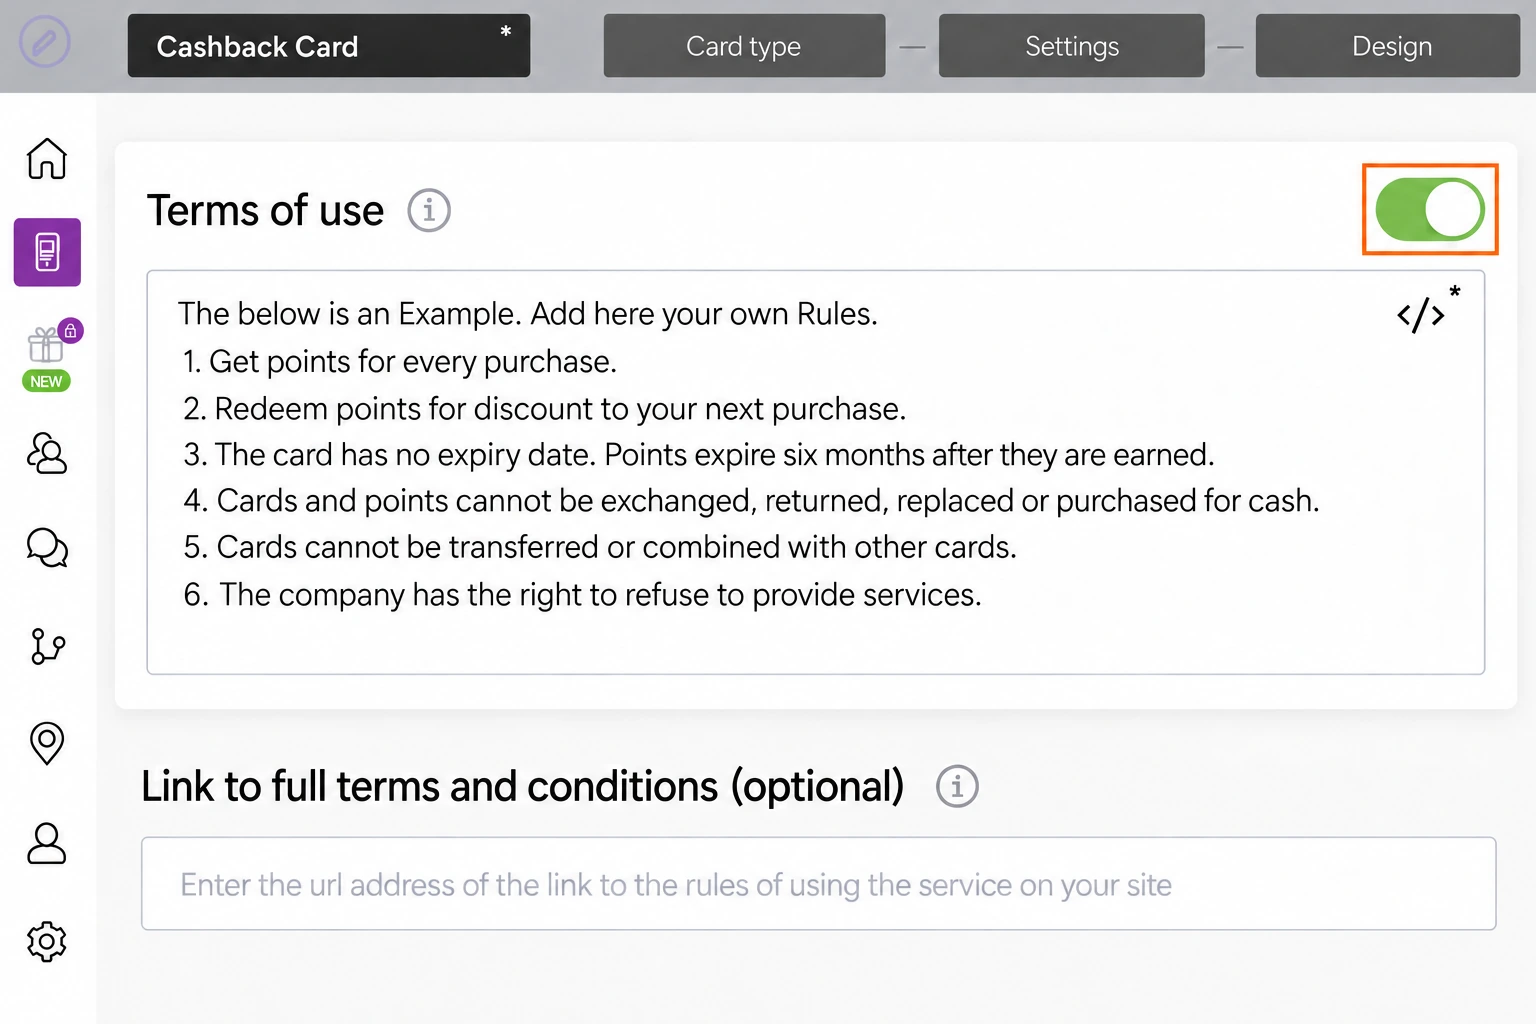
- Turn on Terms of use if you want to include terms on the card, then enter your own rules.
- Make the rules match your earning, redemption and expiry settings. The example card has no expiry date, but each amount of points expires six months after it is earned. Explain what one point is worth in your programme, how spending qualifies a customer for each tier and how redeemed credit is recorded at the till.
- Use Link to full terms and conditions (optional) for your complete terms.
Under Issuer information, enter your Company name, Email and contact number for the back of the card. Check that customers can reach the business using those details.
Save & Preview
- When you have completed Information, select Finish to save the card and open Preview. If a required field is highlighted, complete it and try again.
- In Preview, select Copy link to get the card's installation link, or scan the QR code with your phone.
- If the card is inactive, select Activate Card in Preview when you are ready to use it. The editor also has Activate beneath the phone preview; you do not need to activate the same card twice. Check the card's status before sharing its link with customers.
- Open the installation link on your phone, complete the required fields and check your business details, offer and enabled installation options. Check any optional rewards you have chosen to offer before promoting them.
For installation help, follow iPhone installation or Android installation. The fields and wallet/PWA buttons shown depend on the options you enabled.
To edit the card later, use Save and preview in the top bar to save your changes and review it again. If the screen differs or you cannot finish, contact support.
Record purchases and redeem cashback in the console
Open your Cashback card, select Customers, then select the customer. Current balance is the credit available to use; Transactions amount is the recorded purchase total.
- Earn cashback: select + beside Transactions amount, enter the purchase value, optionally add an invoice reference, and select Apply. Loyaltymaster calculates the cashback from the customer's rate.
- Redeem cashback: select − beside Current balance, enter the points to use, check the corresponding amount and select Apply. Record a matching discount line in your POS so the customer's bill is reduced by the redeemed value.
In the Australian-dollar worked cashback example, 1 point equals A$1. A purchase of A$80.12 at 3% earns 2.40 points. Redeeming 1 point takes A$1 off the customer's bill. The example includes the balance changes and the shop's policy for earning on purchases where credit is redeemed.
Let staff use the Scanner App
Add a manager for each staff member, then give them app.loyaltymaster.com/scanner-app. They sign in with their manager email and password on a phone, tablet or computer.
Select Scan and point the camera at the QR code on the customer's loyalty card. The first time you scan, allow camera access if prompted. The Scanner App scans the code and shows the customer's details. To search instead, select Search customers and enter the loyalty card serial number or the customer's phone number, first name, surname or email address. Check the customer before continuing.
- To earn cashback, select Add, enter the purchase amount, select Add points, then review and confirm with Add. A comment can be entered at confirmation; complete it if your card requires one.
- To spend cashback, select Redeem, enter the points to redeem, select Redeem points, then review and confirm with Redeem. Normally, leave the repeated purchase-amount field in the confirmation unchanged; fill it in only if the card requires it. Check the point value in your card's terms and record the same discount in your POS.
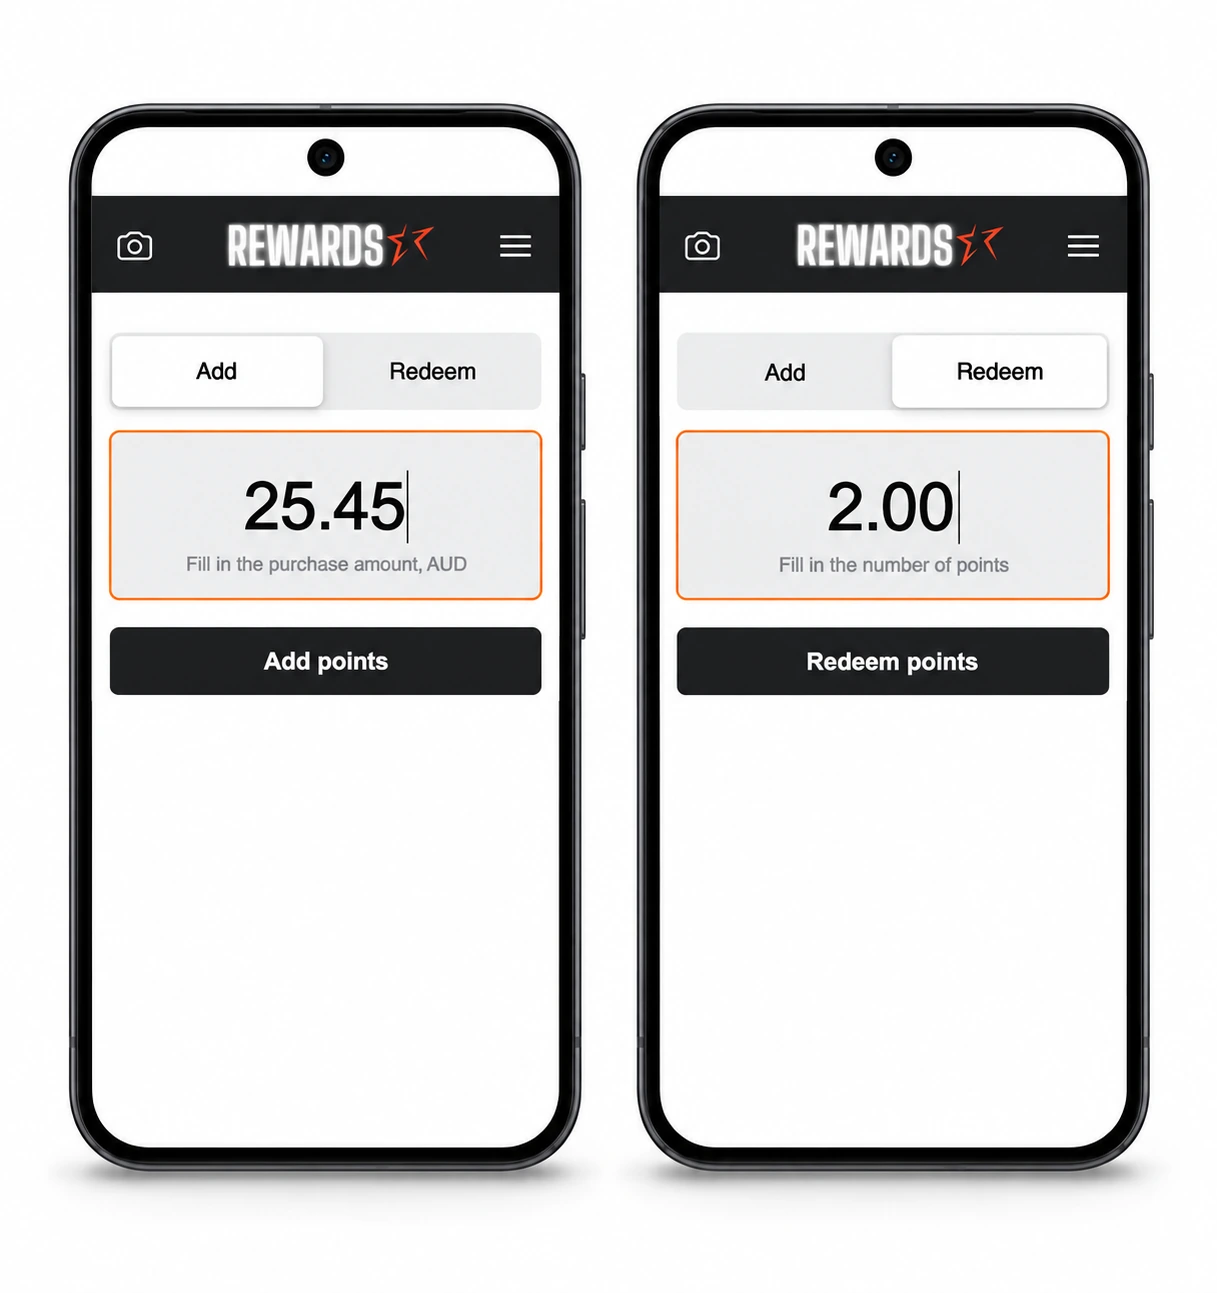
Phone illustrations of the current controls, with customer details omitted. The same Add and Redeem choices are available in the computer browser. Select the image to enlarge it.
Wait for the card-update message and check the balance. See the Cashback scanner guide for the full steps and the worked example for an A$2 redemption.
On the second screen, you can usually just select Add or Redeem after checking the details. If Settings → Purchase amount when charging → Purchase amount is required in Scanner App is enabled, supply the purchase amount if it is not already filled in. Comments are optional unless Require a comment when crediting is enabled. See the confirmation screens.